 For thirty years, Mark Rockwood has worked as a highly sought-after commercial photographer for local and national accounts that include L.L. Bean and Brookstone. But his fine art photography is a decades-long pilgrimage that explores not only the natural world and man’s relationship to it, but the urban environments we have created to provide shelter, workspace and entertainment.
Based out of Portland, Maine, he trained in 1969 as a painter (initially at a Portland school called Concept) before moving on in 1975 to the photography program at Southern Illinois University, and then received his Masters in Photography from the prestigious Cranbrook Academy of Art in 1980. In between, he worked for famed landscape photographer Paul Caponigro as a darkroom assistant.
In this lesson, which also includes video interview, Mark walks us through his portrait-making process and discusses his approach to modern and classic lighting techniques.
Topics Covered:
- The Concept
- Coordinating Workflow with a Stylist
- Mixing Window Light with Strobes
- “Wrapping” Window Light
- Recreating 20’s Movie Screen Lighting
- The Need for Soft Light
The Concept
Having recently connected with hair and makeup stylist Teague Vivolo, I needed a project to determine her skill range and our compatibility working together. It’s always been my practice to test with stylists, assistants and any other critical team members before bringing them on for a serious (real work for pay) project. I chose a young woman photographer as my model because of her unique looks, which reminded me of a combination of two silent film stars: Louise Brooks and Clara Bow. I planned to work toward a 1920’s glamor look as the shoot progressed.
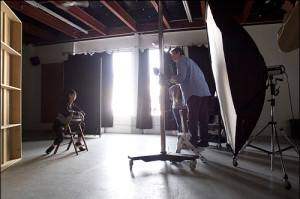
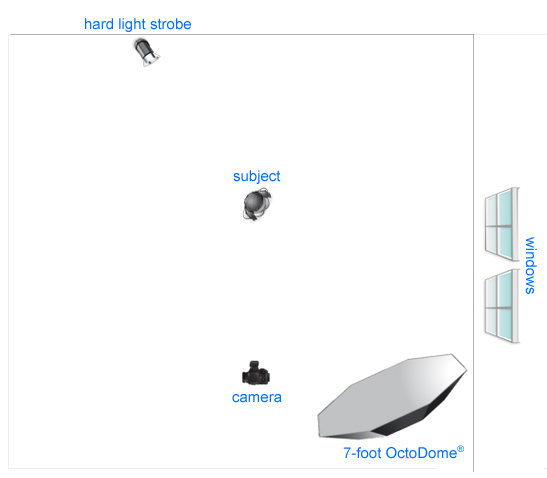
As the shoot “script” was laid out, I planned to begin with a very open, yet directional quality of light. This consisted of a mix of lights:
- Main light: 8×8-foot studio windows to camera right
- Fill Light: 7-foot OctoDome® with StarFlash® 150-watt strobe
- Accent light: strobe with hard reflector attached
Coordinating Workflow with a Stylist
We started with broad, soft light shots to allow Teague to start with the lightest makeup treatment. As the shoot progressed, Teague would build upon the makeup to adjust for the lighting, which would become more complicated and high in contrast, a staple of 20’s and 30’s celebrity/glamor photography. Working with a makeup artist in this manner saves time since the stylist doesn’t have to “strip” off earlier layers of makeup to soften the look.


Mixing Window Light with Strobes
Because my main light consisted of indirect window light, I needed the ability to reduce the supplemental strobe power to very low output levels so they could be blended into the shot without overpowering it. By placing the 7-foot OctoDome® somewhat behind me, I was able to create a very broad soft source that mimicked the quality of ambient light that would be produced by an adjacent window light.
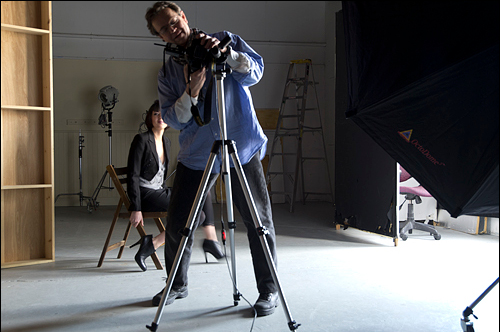
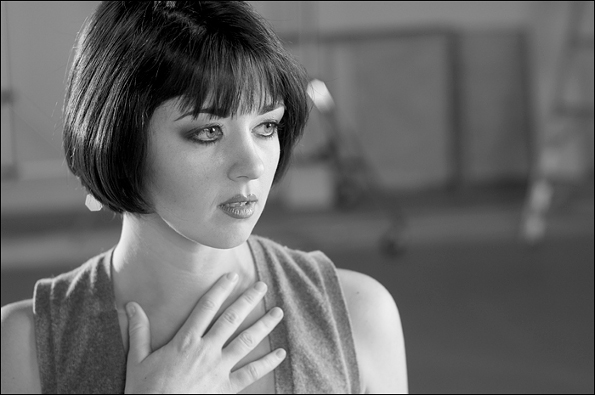
On the back left, I used a strobe head with just a hard reflector attached (no diffusion) to accent the left side of the model and separate her from the background on that side. I used a black card to cut the light somewhat and keep it from flooding the background. Here is a bird’s eye view diagram of this first setup.
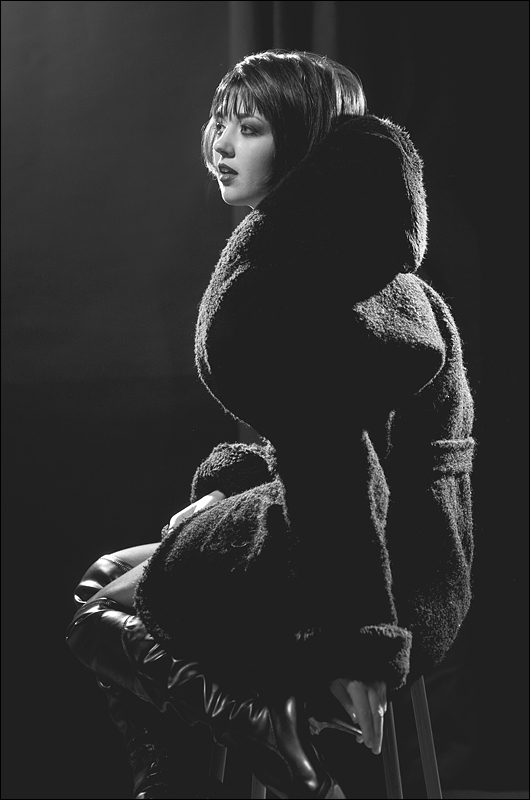
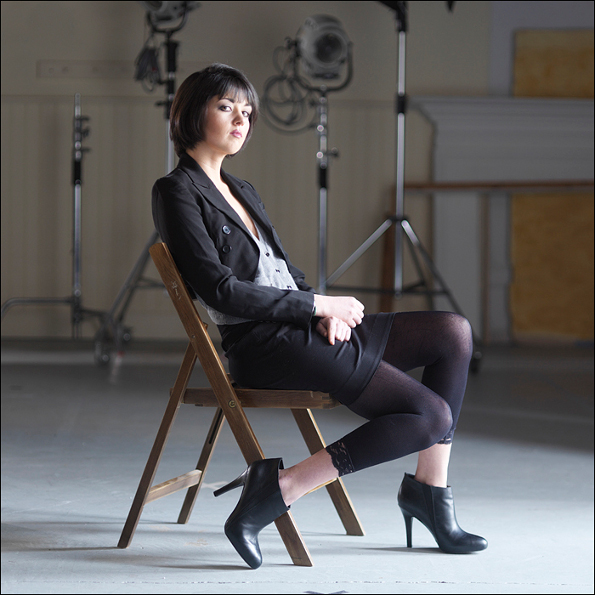
We were playing with the idea of a “backstage” environment, where our young performer is captured here exhausted after a night of performing. The contrast of the extreme soft light sources (the window main and the 7-foot OctoDome®) against the very sharp bare head gives the scene an almost “unlit” feel of a real environment.
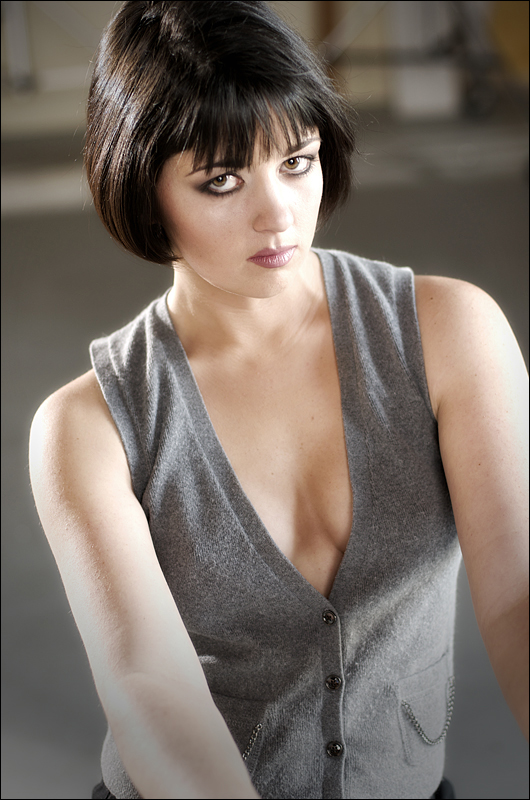
Here’s a tighter crop without the jacket, in both color and black and white.
“Wrapping” Window Light
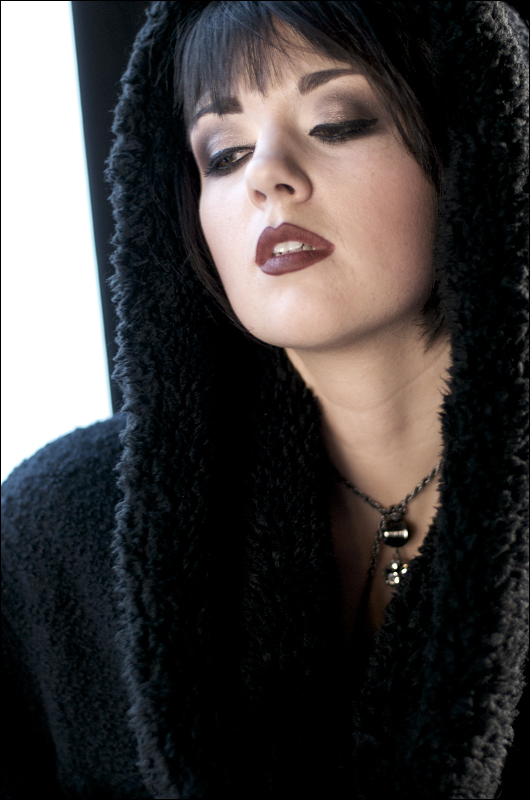
Next, we moved the camera and computer station to the center of the studio, where we were about 15 feet from the window source. I had the model stand at the edge of the window, right shoulder to the black studio curtains. Teague had outfitted the model with a costume for the developing 20’s/30’s look and then added to the eye makeup slightly. I used almost the same lighting tools again, with the 7-foot OctoDome® behind me and in front of the model. The variable control of the StarFlash® 150 allowed me to dial the power up until it “wrapped”, or extended, the effects of the window light across the model’s face.
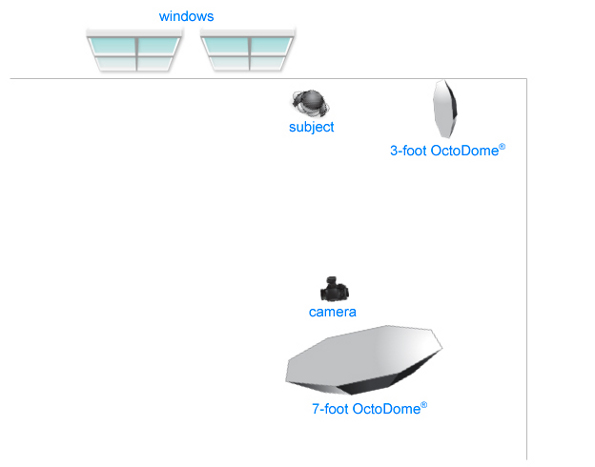
I shot a few versions of the shot with just window light and OctoDome® fill, then added a 3-foot OctoDome® and placed it behind the model along the wall. This supplied the edge light that once again separated her from the dark background on that side.
Recreating 20’s Movie Screen Lighting
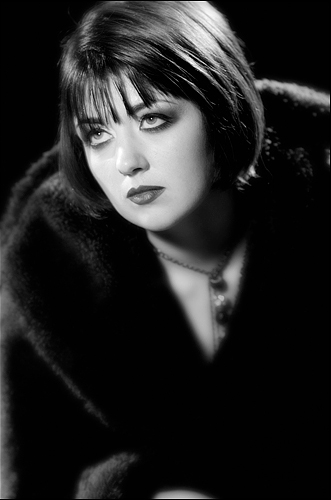
The third setup was the target for the day. I planned to use my three strobe Fresnel spot lights to produce a version of the stylized light of the early days of film. Still photographers hired by studios to produce publicity photos of the stars of that time used many of the same light sources as filmmakers. A range of sizes and intensities gave the photographer control and could mimic the glamorous look fans were used to seeing on the movie screen.


Here, I used a 16-inch Fresnel as my main light and placed it about ten feet up, camera left, with the beam focused tightly on the model’s face. I then placed a 6-inch Fresnel at the same height, left rear, hitting the side of the model’s head and focused wider to cover her from head to upper leg. The third spot was on the back right and about seven feet high. I powered these three focusing lights down as far as possible so that I could use a wide aperture setting. This in turn would provide the classic shallow depth of field so often seen in photography of that era.
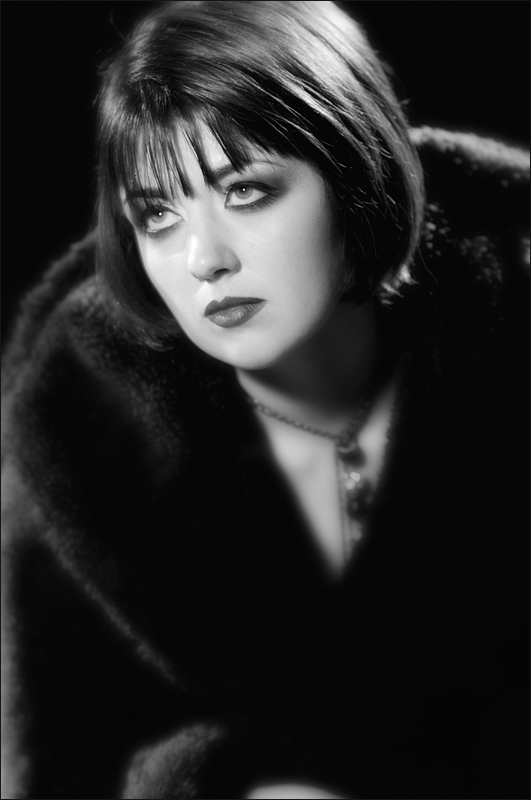
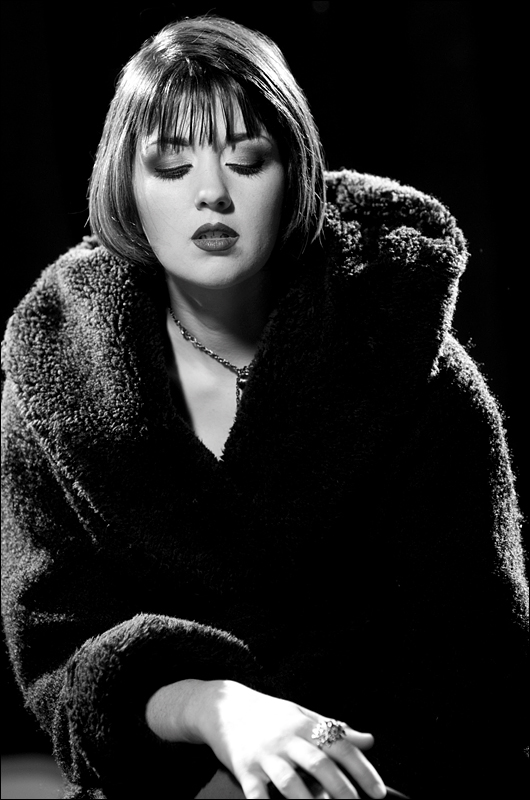
 After firing off a few dozen frames, I felt that the light was a little too harsh and restricted the model from looking anywhere but straight in the direction of the main, which resulted in looks that were too dramatic and somewhat unflattering. So, I turned the 3-foot OctoDome® back on again to bring low values back into the shadows, and this allowed the model to look away from the main light without slipping entirely into blackness.
The Need for Soft Light
The tonal range of film and paper used in the 20’s and 30’s was so much softer with grayer blacks than contemporary processes, and therefore you need to incorporate soft lighting in order to recreate that feel of old film. Having hard detail-less shadows in this case wouldn’t have provided that authentic feel I was looking for. For example, much of the subtle sculpting the stylist did with cheek bone and jaw line accents would have been washed out without some soft lighting added. The 3-foot OctoDome® helped to provide some control of how round the model’s face was being rendered in this predominantly hard main light.
I came away from the shoot happy with the results, as well as having a very clear picture of the tools the stylist brought to the table. She really brought a lot of ideas and suggestions that varied the shoot and added to the range of poses and looks we were able to capture.
Lighting Equipment
- OctoDome® Grid: small (3 foot)
- StarFlash® 150watt 3 foot OctoDome® Kit
- StarFlash® 150watt 7 foot OctoDome® Kit
Written and photographed by Mark Rockwood. To see more of Mark’s work, visit: www.markrockwoodphotography.com
Setup shots and edited by Ben Clay.
Special thanks to makeup stylist Teague Vivolo (mcteaguemakeup@gmail.com)
| PHOTONews on Facebook | PHOTONews on Twitter |


