Exploring the Negative Solutions Enthusiast Plus Kit for Film Digitization
As someone with decades of negatives and slides—from my childhood through to the early days of digital photography—I’ve been eager to digitize my collection. My archives include everything from precious family memories to creative experiments. Now I have the tools to bring them into the digital age. Enter the Negative Solutions Enthusiast Plus Kit, designed for digitizing 35mm, 120 and 4×5 film, both negatives and positives.
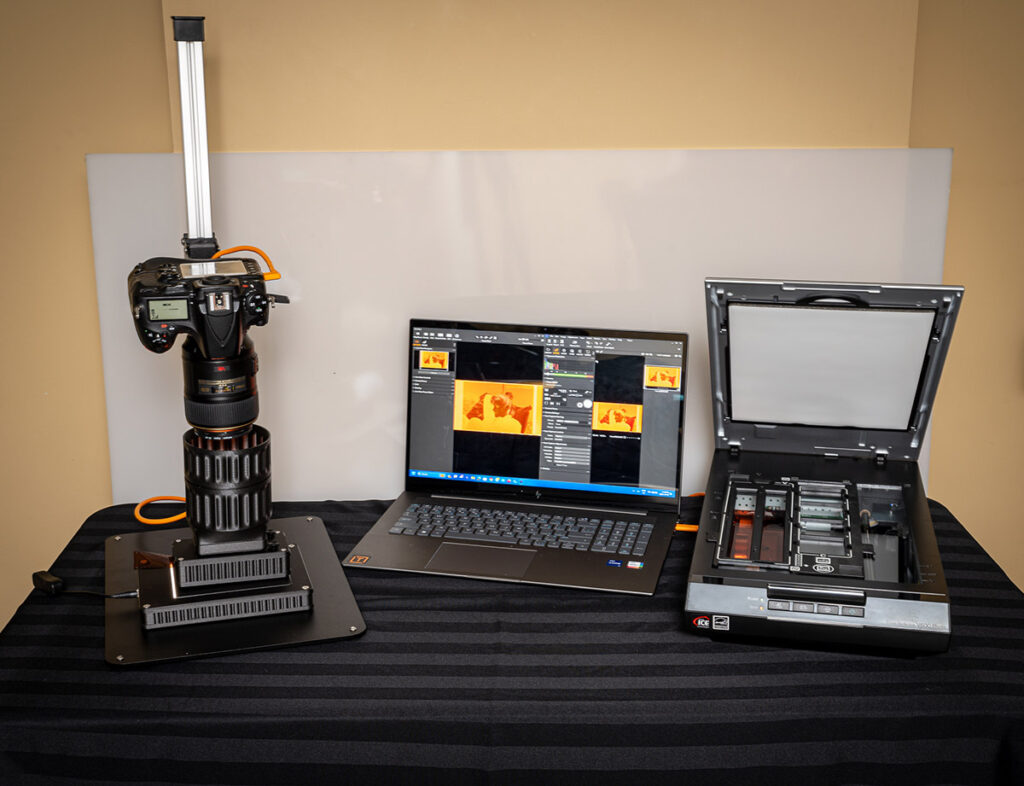
For this test, I used my trusty Epson Perfection V600 Photo scanner and compared its results with a camera-based workflow using the Enthusiast Plus Kit. To keep the process consistent with my digital workflow, I utilized CaptureOne, Lightroom Classic and Photoshop for image processing.
The Film
The film negatives I worked with were Kodak Gold 200, shot and developed in December 1999. These images hold sentimental value, featuring my youngest son at under a year-old during Christmas, alongside my parents, second-eldest son, my wife and me. Preserving these memories digitally ensures they remain accessible to my entire family for years to come.
What’s Included in the Enthusiast Plus Kit?
Negative Solutions recently upgraded its product line, bringing premium features from its Pro Kit into the Enthusiast series. The kit provides all the essentials to digitize 35mm, 120 and 4×5 film:
- Basic Riser XL: A sturdy riser to mount your camera.
- 4×5 Light Source Basic MK2: A high-quality 99CRI light source for uniform illumination.
- Film Carriers (35mm MK2 & 120 MK2): Improved designs for flat film alignment and quick scanning.
- 4×5 Sheet Film Scanning Kit: Designed specifically for larger formats.
- Mounted Slide Scanning Kit: For vintage and standard mounted slides.
- Stabilizing Masks: To center film carriers over the light and prevent shifting during scanning.
All you need is a digital camera and a macro lens. For this review, I used a Nikon D810 with a Nikkor 105mm macro lens. Shooting tethered into CaptureOne via TetherPro USB 3.0 to C cable ensured precision and control, with my camera set to ISO 64, 1/125s, and f/8—the sharpest aperture for this lens.
Camera-Based Setup
- Mount the camera on the Basic Riser XL and secure the light source below.
- Adjust the height to frame the film correctly and manually focus the lens. Switch to manual focus and disable VR/IS/VC
- Insert the film into the Negative Supply Film Carrier, align it with the light source and capture frame by frame.
- Advance the film manually.
The process is impressively fast, with a strip of five negatives digitized in mere seconds.
Epson Perfection V600 Photo Scanner
Using the V600 scanner was more time-consuming and required careful setup:
- Film holders for 35mm, slides and 120 negatives had to be aligned precisely.
- The scanner’s resolution was set to 1200 dpi for speed, resulting in smaller 1.3MB files at 1,648×1,040px resolution. At its maximum resolution of 12,800 dpi, each scan took up to five minutes, producing a 51.8MB file at 17,578×11,093px with outstanding detail. The raw D810 files are 35.8MB at 7,380×4,928px.
The Epson created separate files for each scan and offered built-in negative-to-positive conversion, which saved processing time but occasionally produced less accurate colour tones compared to manual adjustments.
Image Processing
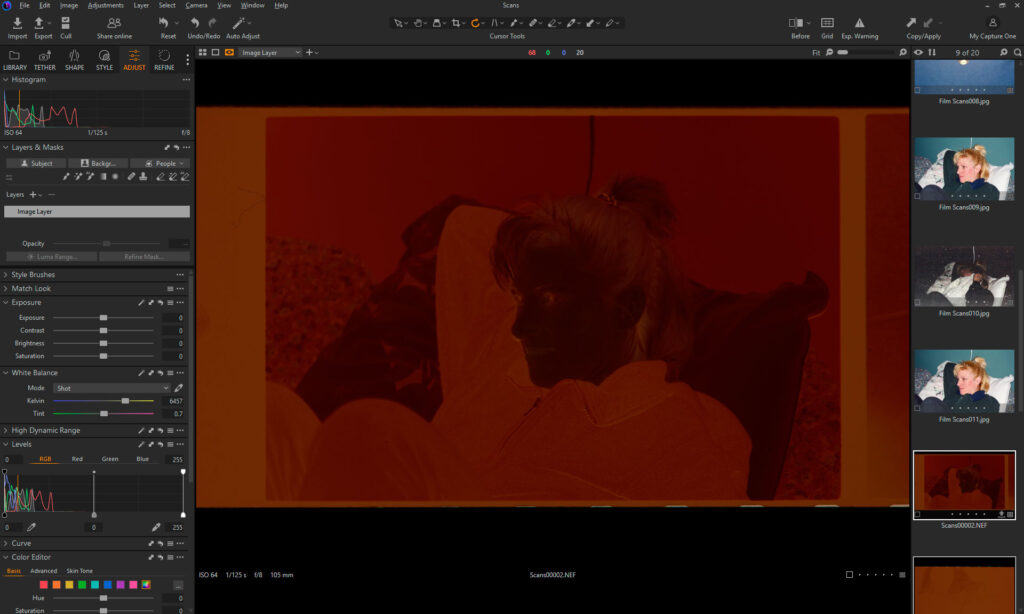
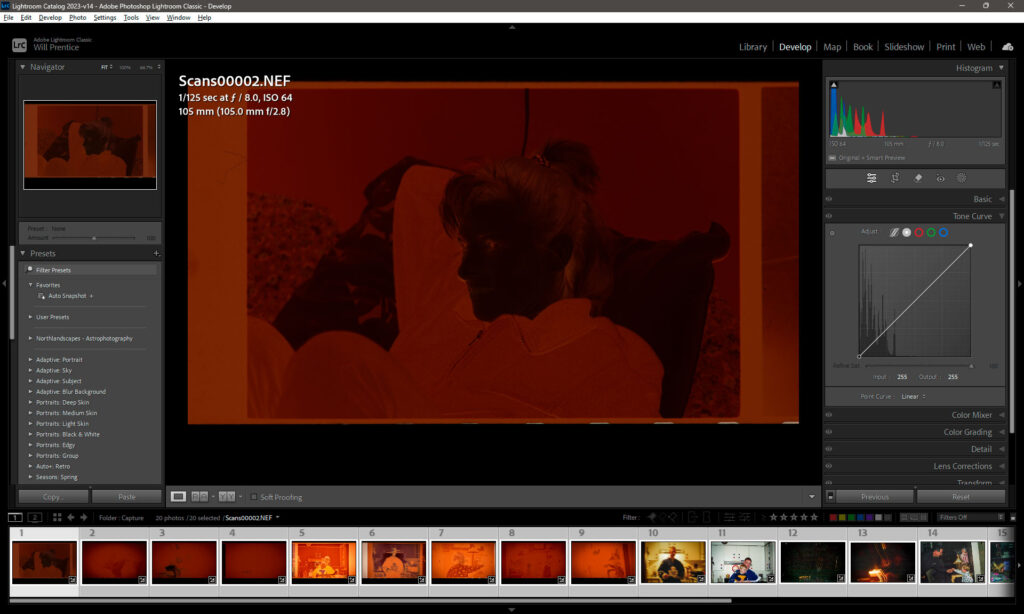
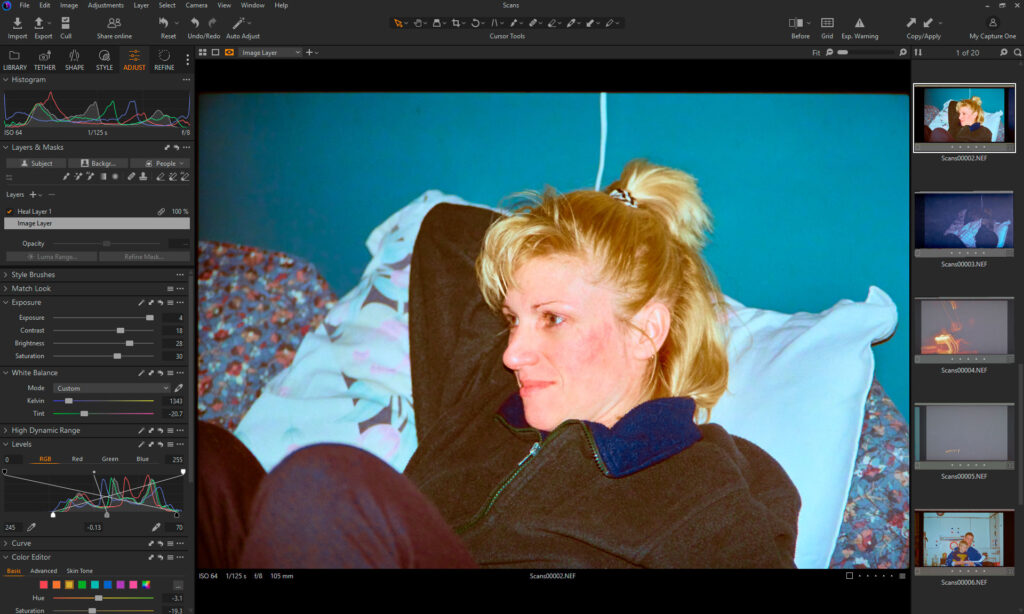
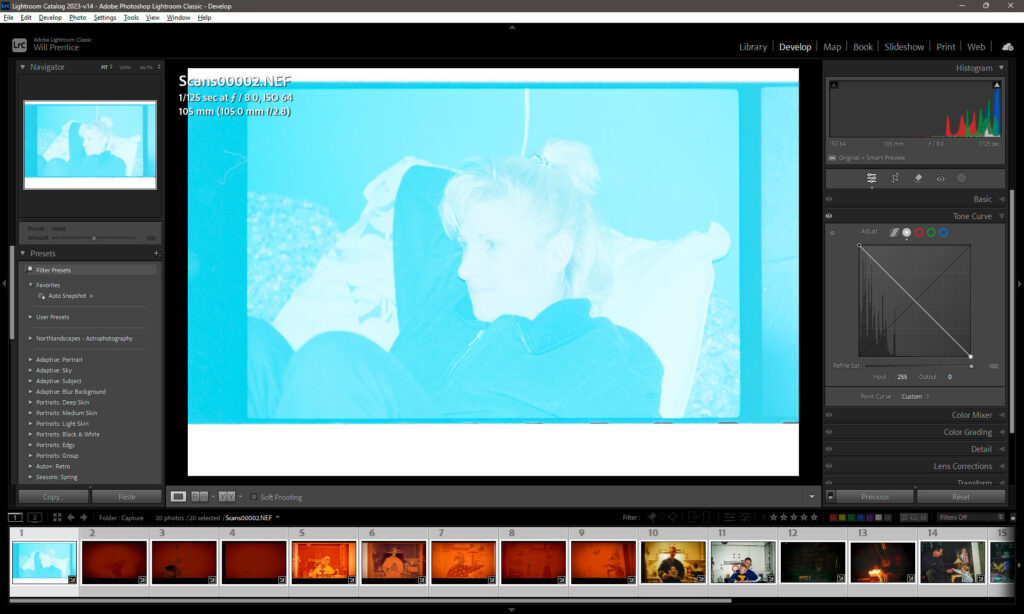
With the camera workflow, the imported images appeared as colour negatives. The first step was inverting the tone curve:
CaptureOne Input
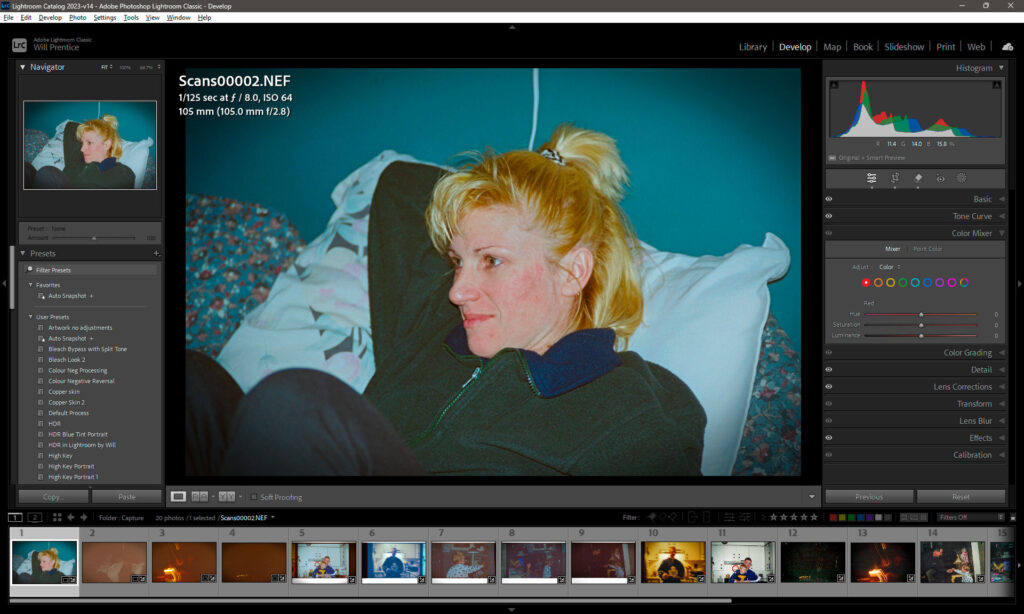
Lightroom Input
- In CaptureOne, drag the black and white points to opposite ends to invert the image.
- In Lightroom Classic, click on Tone Curve, change “Point Curve” to “Linear” and drag the dark point to the top and white point to the bottom.
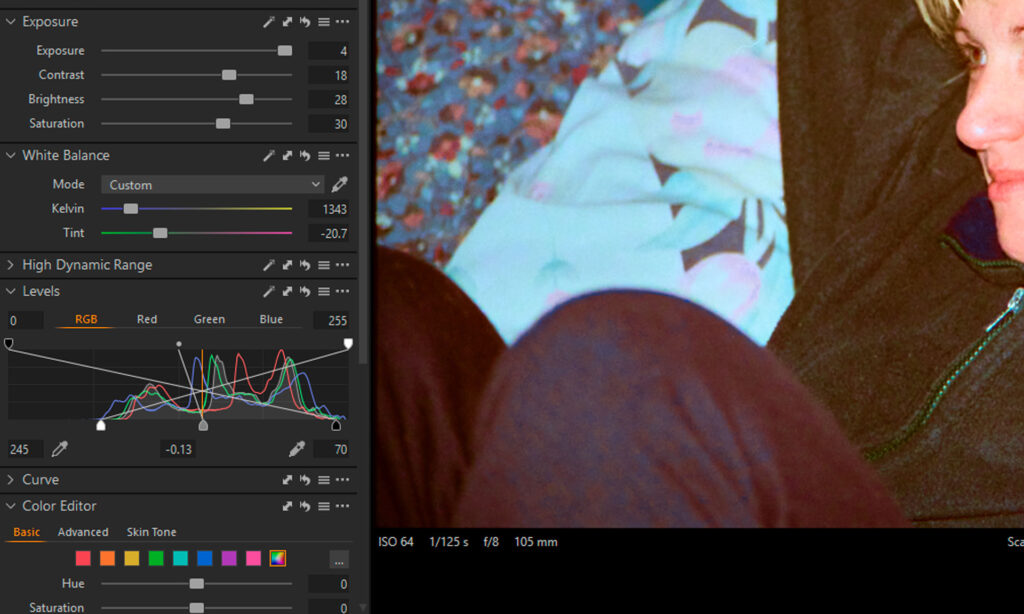
I found that setting the black and white points closer to the histogram gave me better results than simply dragging all the way to the ends.
Setting white balance proved challenging if a neutral grey point was missing in some frames, requiring manual adjustments. From there, I applied standard post-processing techniques. It’s important to note that, as negatives, adjustments to exposure and colour sliders work in reverse—a learning curve for anyone new to this process.
After initial adjustments, images were imported into Photoshop for final edits, including Auto Tone, Auto Contrast, Auto Colour and noise reduction via Topaz DeNoise AI.
Results and Observations
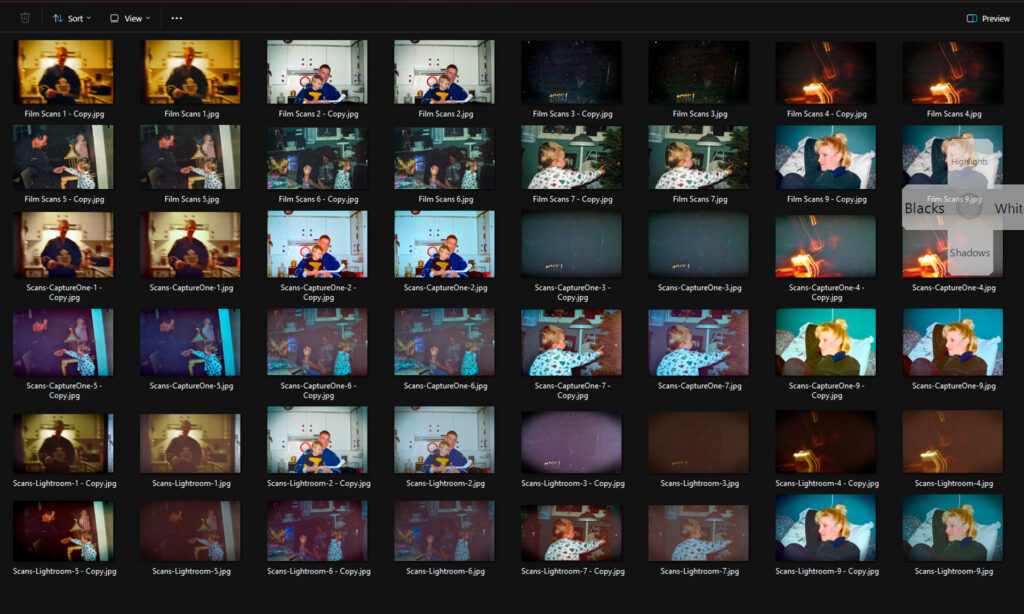
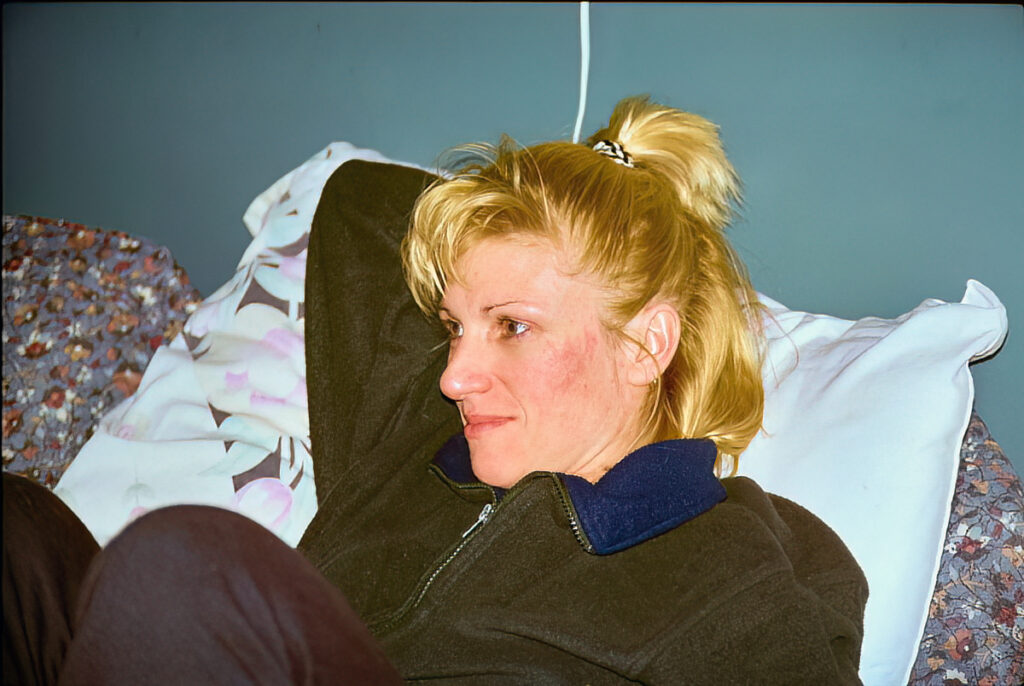
The results varied depending on the exposure quality of the original negatives and the software used:
- For properly exposed negatives, the camera workflow with CaptureOne produced sharp, vibrant images with excellent detail.
- The Epson scanner excelled with underexposed negatives, offering better tonal recovery.
- Lightroom’s processing sometimes resulted in washed-out colours, but saved presets helped streamline the workflow.
| Original: | 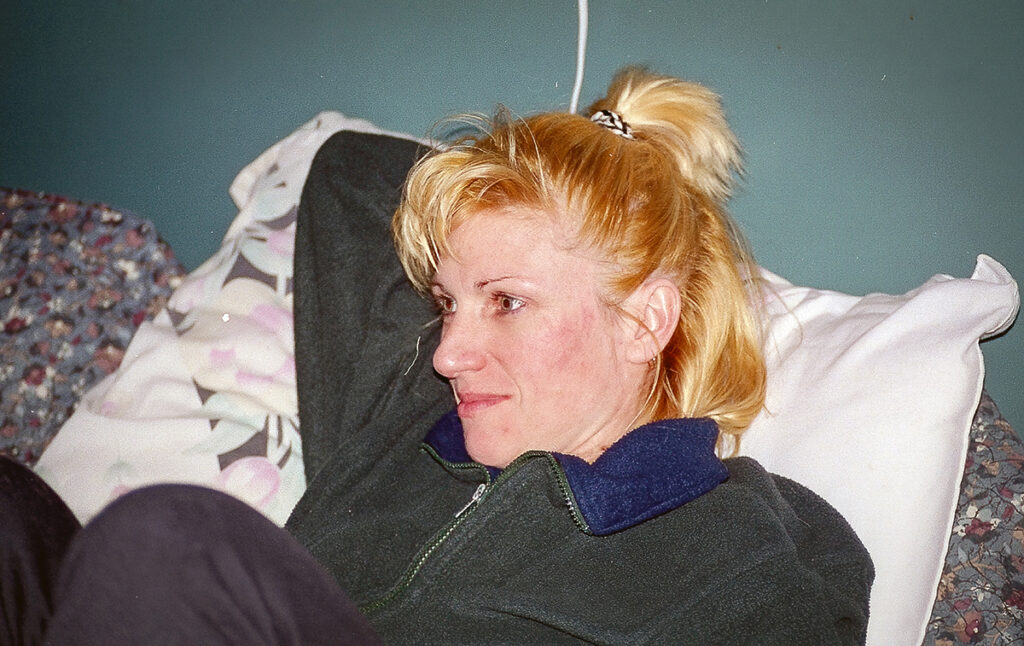 |
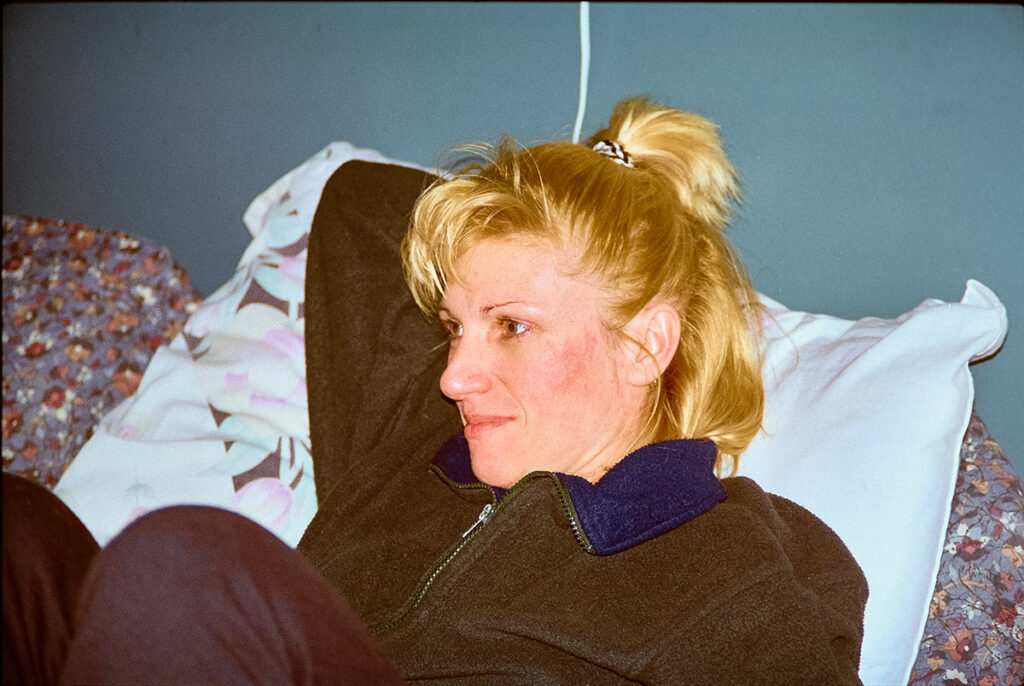 |
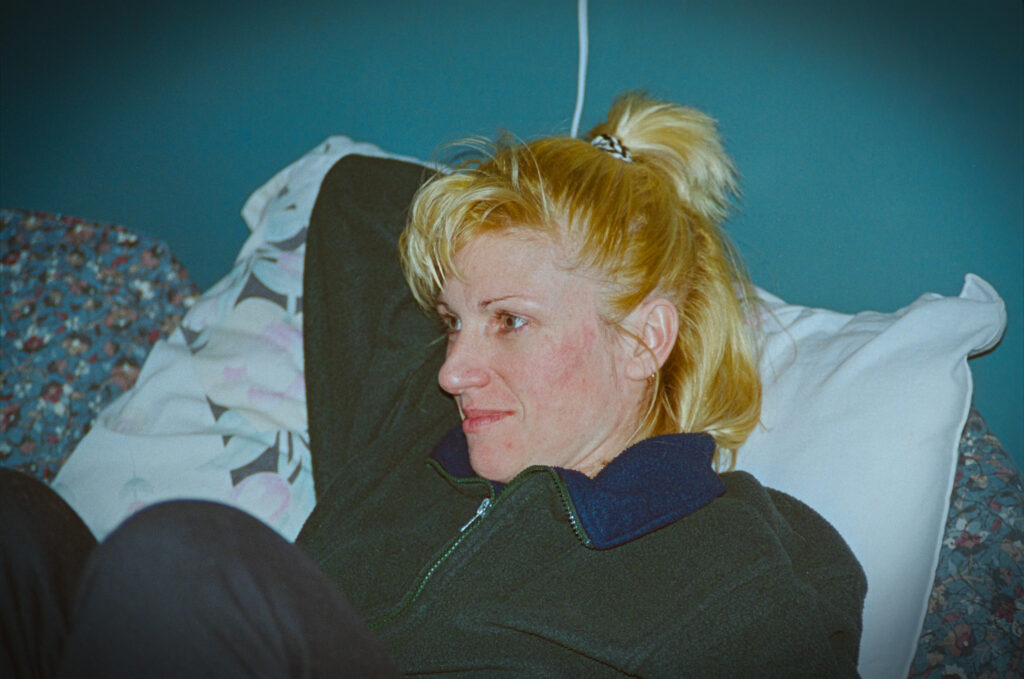 |
| Device:
|
Epson V600 Photo
|
CaptureOne
|
Lightroom Classic
|
| Photoshop Edited: | 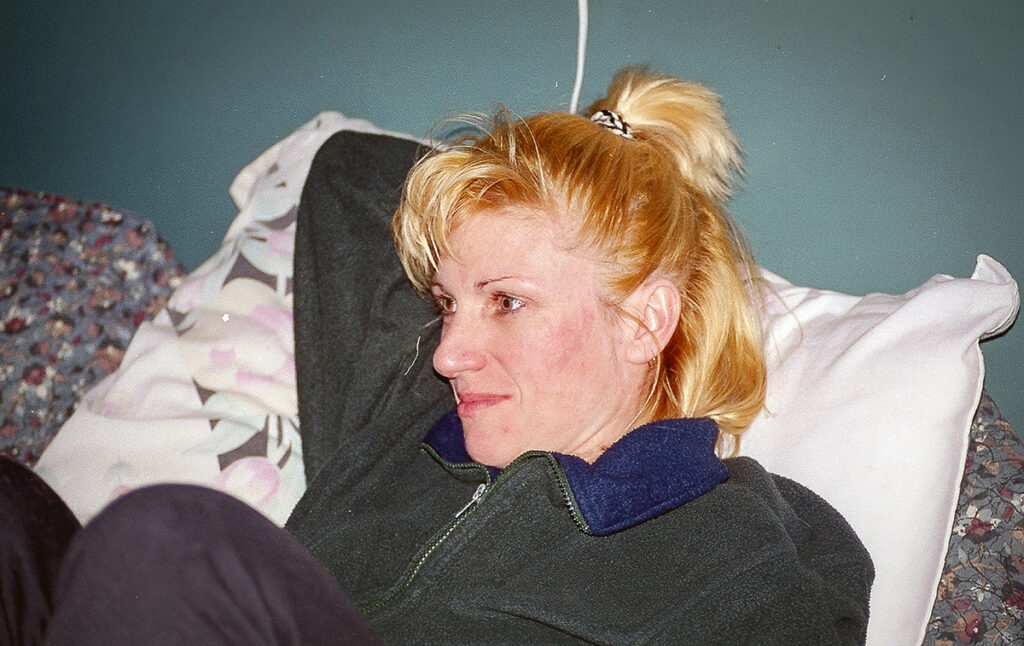 |
 |
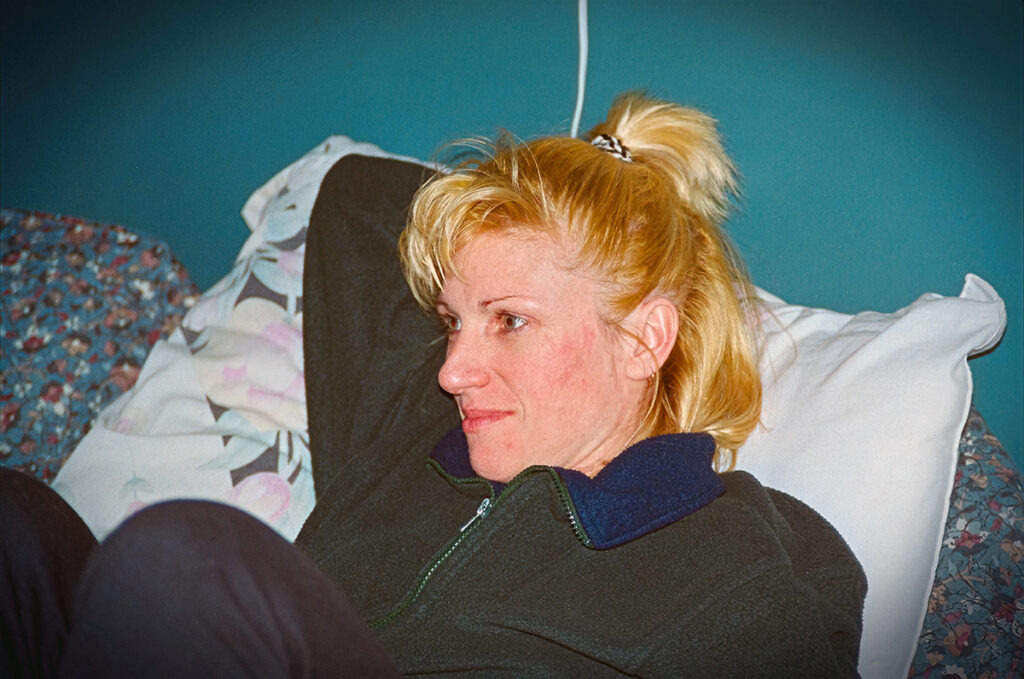 |
Speed and Convenience: The Negative Solutions kit was significantly faster than the Epson scanner, digitizing an entire roll of negatives in the time it took the scanner to process one ultra-high-resolution frame.
Image Quality: While the camera workflow generally provided superior sharpness and flexibility, the Epson produced files with accurate neutral greys and handled dark negatives more effectively.
Conclusion
The Negative Solutions Enthusiast Plus Kit is a game-changer for anyone looking to digitize film efficiently. It offers speed, ease of use and exceptional results for well-exposed images. I’m going to try exposure bracketing next to see if that helps the captures from the D810. Film has a 12-stop range and my D810 has 13.7 stop range, so I should be able to improve on these results. The Epson V600 remains a solid option for those prioritizing tonal recovery or working with challenging negatives, albeit at a slower pace.
Next, I plan to test this setup with black-and-white film to explore its full potential.
What’s Your Take?
Do you have a preferred method for digitizing your film? Share your experiences in the comments below or join the conversation on our Facebook and Instagram pages.
Negative Solutions products are available in Canada through Amplis Foto and your favourite photography retailer.
Discussed Items
Author: Will Prentice
A portrait, fine art and commercial photographer for 30 plus years, Will Prentice is not just a contributor to PHOTONews magazine, but also host of PHOTONewsTV, owner of Captura Photography+Imaging and Technical Support/Brand Manager for Amplis Foto, Canada’s largest distributor of photographic equipment.
Will teaches photographers of all skill levels how to improve their craft – from creative photo projects to picking the right gear for their needs to flattering lighting to getting the best expressions to creating final images for screen and print. His unique style of highly detailed images with perfect tonality, wide dynamic range and stunning colour is instantly recognizable. Commercial clients rely on Will’s creative eye and mastery of lighting.
When he’s not behind the camera or in front of a class, you’ll find Will outdoors in any weather – usually on one of his bikes or enjoying time with his grandchildren.


