The word Photography is derived from two Greek words; photo – meaning “light” and graphy – meaning “to draw”. Enter long exposure photography in the digital age, and what better way to allow the natural light to draw the scene before you. Long exposure photography will let light scribe the definition and contours of the landscape in front of you, revealing an appealing image.
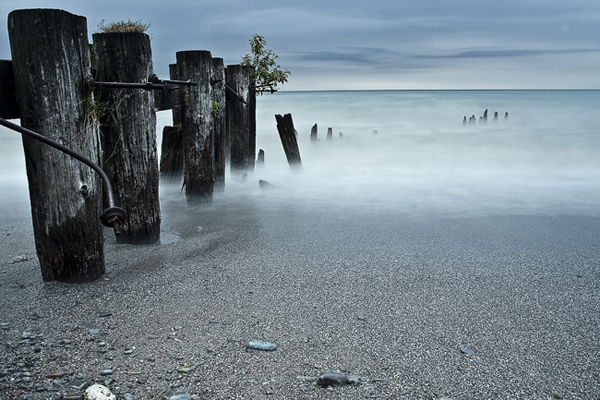 |
| Grimsby, Ontario – photo taken one hour after sunrise on a cloudy and rainy day. 15 seconds, f/22, ISO 100 |
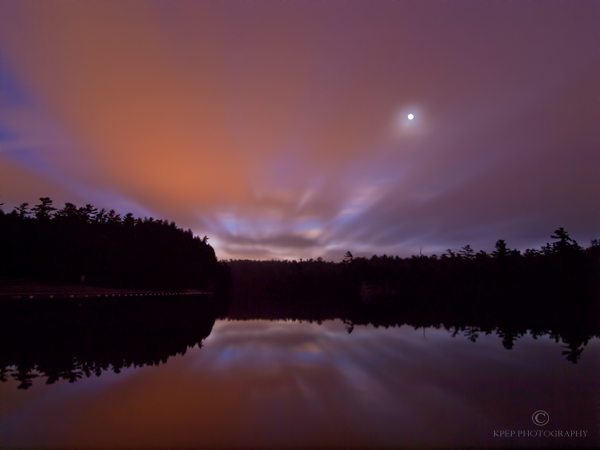 |
| Rockwood Conservation Area – photo taken one hour before sunrise on a scattered cloudy night. 113 seconds, f/5.6, ISO 100 |
Long exposure images elongate the moment that a photograph was taken until the reality of the scene before you takes on a surreal twist. Running water becomes a silky substance, raging oceans turn into calm pools of glass, stationary cumulous clouds turn into streaking lights across the blue hour or night sky, and for the patient few, even the bright stars above us can be transformed into bright trails that arc around the north star in the sky.
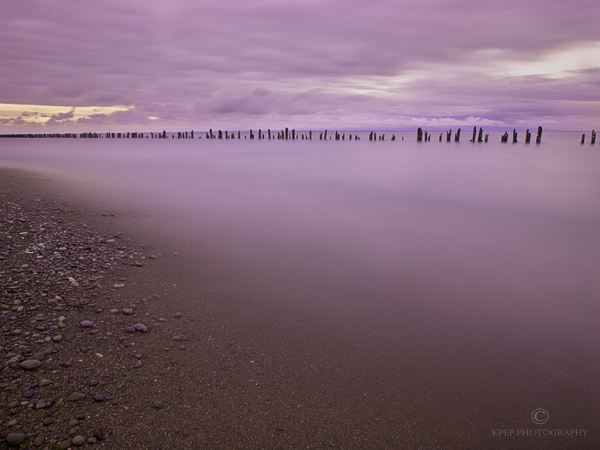 |
| Erieau, Ontario – photo taken just after sunset on a fall evening with a 90% cloud cover and no moon in the sky, 60 seconds, f/22, ISO 100 |
Personally, there are two reasons I enjoy long exposures. One reason is that it gives me the ability to remove texture from certain parts of the image and introduce appropriate tension. Take a waterfall; you can replace hard, high contrast falling water with a silky flow. Using the water as a lead line into the photo, it allows the eye to focus on the textures and structures of another part of the image. Or even take the water of an ocean, undulating, crashing waves can easily be transformed to placid glass and allow a wooden pier or rocks on a beach to punch out onto the image. The second reason I enjoy long exposure photography is that it allows you to control the introduction of light into an otherwise dull image. It evokes emotion in a photo, and can, if done properly, force the eyes where you, as the photographer, wanted them to go.
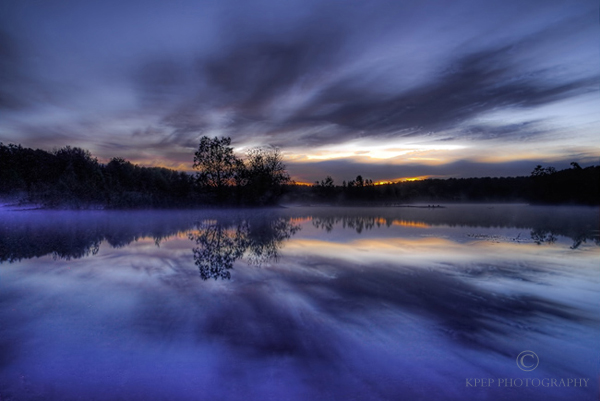 |
| Puslinch Lake – photo taken just before sunrise, 60 seconds, F/20, ISO 200. |
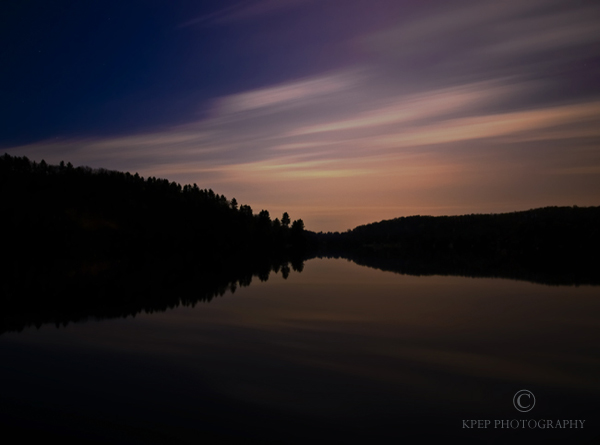 |
| Salerno Lake, Ontario – photo taken at 11pm on a fairly clear night. The moon was 50% and there were a few moving clouds in the sky, 240 seconds, f?3.5, ISO 100 |
OK, now that you have seen a few examples and know what long exposure can do to your images … How do we accomplish this type of photography?
Tools of the trade
- A DSLR camera with the ability to shoot in RAW, the capability to set long exposures including BULB setting and also manipulate ISO and aperture.
- A sturdy tripod to hold the camera in place while you are taking the image. Sometimes you are in water, sometimes you are out in the middle of nowhere to eliminate light pollution, so a sturdy tripod that can protect your camera is imperative.
- A cable release to eliminate camera shake (or, a camera with a shutter delay)
- Neutral density (ND) filters and graduated neutral density filters (not necessary, but in time, you will want them)
- A flashlight and a glow stick … You are mostly doing this at night; the glow stick can sit on the neck of the tripod so you know where your camera is at all times. The flashlight is so you can see in the dark.
- Appropriate clothing… you do more standing than pushing the shutter button. It can get a little chilly if you show up dressed for daylight and two hours later its black and you are on a windy beach somewhere.
- Editing software. Nature is rarely perfect. So, using the RAW editor and giving you the ability to further manipulate, colours, shadows, highlights and clarity will empower you to give the image some final tweaks.
Let me go into some details on the “tools of the trade”. My ideal setup for long exposures is to use a wide angle lens, mount the camera on the tripod, lower the camera close to the ground for a better perspective and I manually focus on the foreground about 1/4 or 1/3 up from the bottom of the image.
I set my aperture to f20 or f22 if there are no lights or moon in the image. If the moon or manmade lights are in the image I will open up my aperture to F/8. I will then place my shutter speed to BULB to give me more control at timing of the exposure. I will set my ISO around 400 or less. Generally, I set the ISO at 100 ISO. If you are a NIKON or Canon shooter, try higher and lower ISO’s and see what it does to the shutter speeds. Your ISO capabilities are superior to my Olympus for eliminating digital noise.
I meter the light at the foreground, focal point first, and then I meter just the sky. I use the appropriate ND filter that will give me the desired length of exposure, and then apply a graduated Neutral Density (ND) filter to adjust the exposure of the sky to match the foreground. There are a few manufacturers of ND filters. You can screw on ND filters or use square filters that sit in front of your lens. ND filters come in different levels, each eliminating a percentage of the natural light. The graduated ND filters are just that, graduated from clear to a set ND strength… these are sometimes overlooked but make a huge difference in the final image. Some photographers prefer to have more control and do this in an editing program, me, I am more of a purist and like to do this in the field.
Then, when I am set, I take the image, holding the shutter release for the appropriate time. I then check the image in the viewfinder, and will then take one longer exposure and one shorter exposure. I usually do not take anything less than 100 images when I am shooting one area… remember, this is the digital age, it does not cost you anything to take an image other than time.
When I am in front of the computer at home and I have all the images downloaded. I open everything in a RAW editor. The RAW editor will allow you to adjust clarity, exposure, blacks, fine tune the colour and give you a chance to create a top notch base image.
Once the RAW editing is done, and because nature is rarely perfect, you can now clone out imperfections, eliminate digital noise and edge creeping from unwanted items, plus do any other editing you wish to do to your image. Once complete, you will hopefully have a final product you can share with your friends or hang on your wall.
Article by Kevin Pepper. For more information, please contact Kevin at www.kpepphotography.com
| PHOTONews on Facebook | PHOTONews on Twitter |


