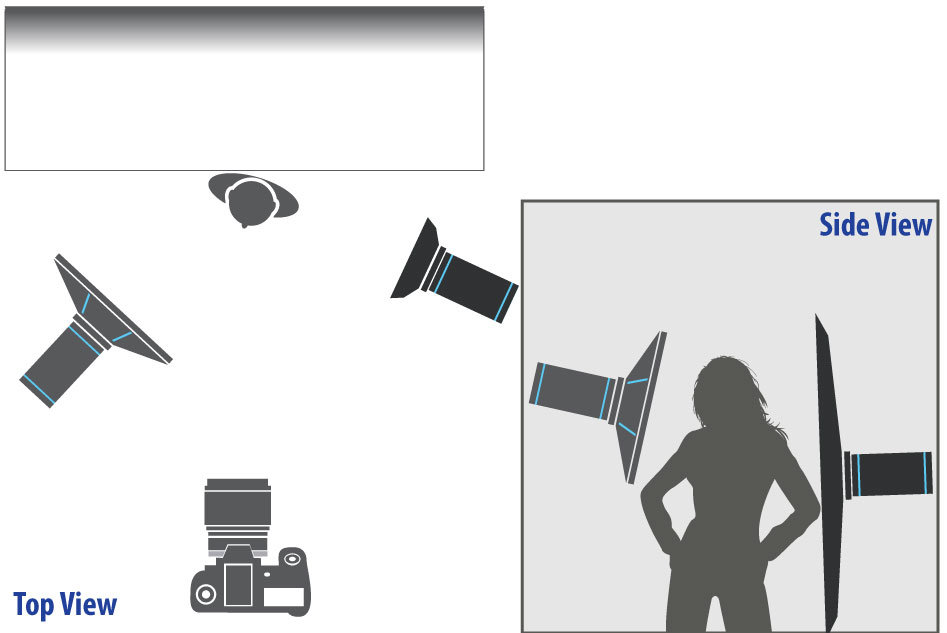
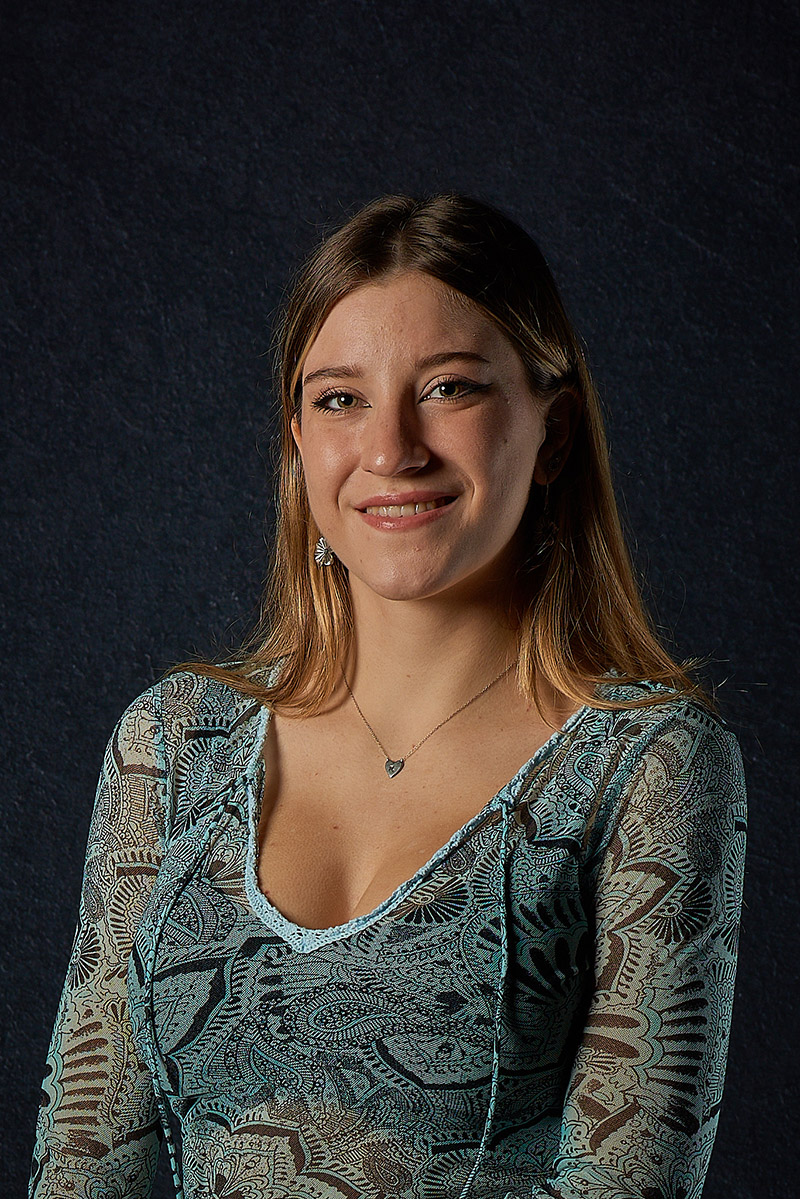
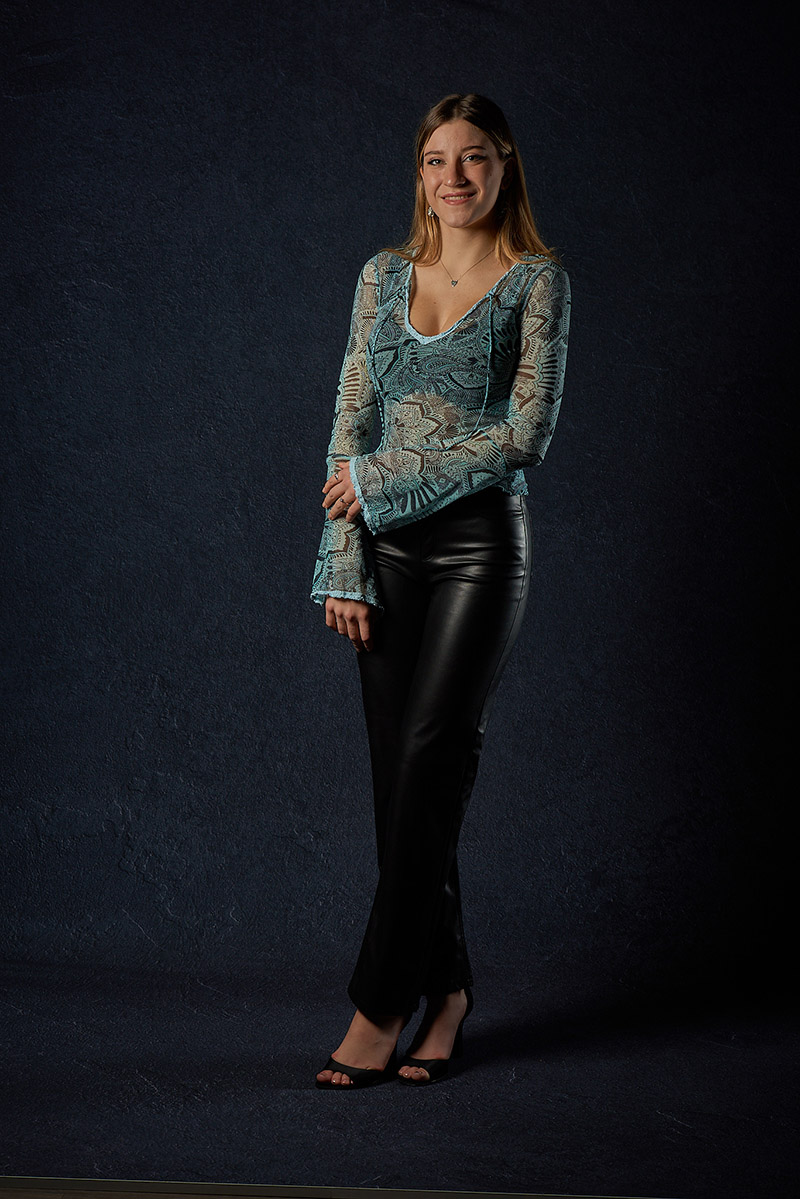
Welcome to the seventh installment of our new monthly that highlights a different Elinchrom Light Shaper or Lighting Technique, with sample images (full length and cropped headshots) and lighting diagrams. All the images were photographed with the same model and outfit (standing in the same spot on the background – about 3 feet away), the same day in the same blacked out studio, with the same strobes at the same height (forehead height) & distance (about 5 feet) from the model and the same camera setup. I tried to remove as many obstacles as possible so we can compare light shaper effects.
I used an Elinchrom FIVE battery monolight triggered by the Elinchrom Transmitter Pro. My trusty Gossen Digisky light meter ensured consistent exposure values – it has an integrated Skyport transceiver to remotely trigger the FIVE. My Nikon D810 had a Tamron 85mm f/1.8 lens and all was mounted on a Vanguard VEO 3+ 263CB tripod. Camera settings are ISO64, f/8, 1/125s We used an Easiframe backdrop system with the Grey Texture backdrop. I tethered my camera into Capture One on my laptop with a Tether Pro USB-C to C cable and connected my laptop to a large screen TV with a TetherPro HDMI cable so we could review images on the big screen.
Special thanks to Phil and RevPrint Studio (https://www.revprint.com) for the use of their space. Phil hosts workshops featuring Elinchrom gear via West Toronto Photography Group (https://www.wtpg.ngo/)
This month, I’ll share some simple and effective two light setups, including lighting diagrams and some do’s and don’ts. I’ll explain where and why I positioned the lights and modifiers I used and why you should and shouldn’t use some of these setups. These setups can be done at home, in studio or on location.
Since I’m doing portraits, I chose the Deep Octa 70cm as my key light. If you recall from the very first installment, the Deep Octa is one of my favourite light shapers for portraiture due to the fairly round catchlights and the way it wraps light around your subject, giving your portrait dimensionality.
One Light Setup – Deep Octa 70cm (for reference)
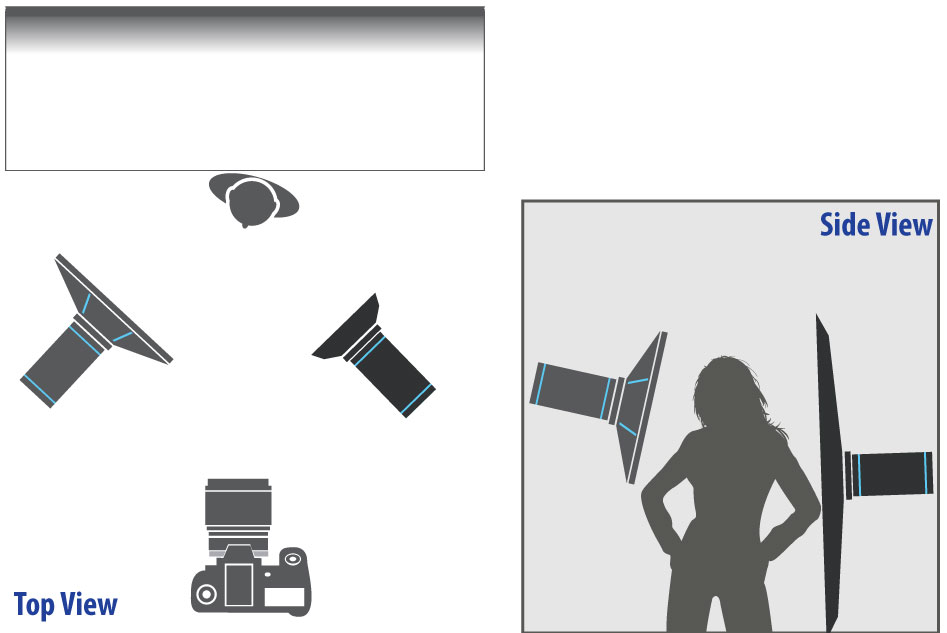
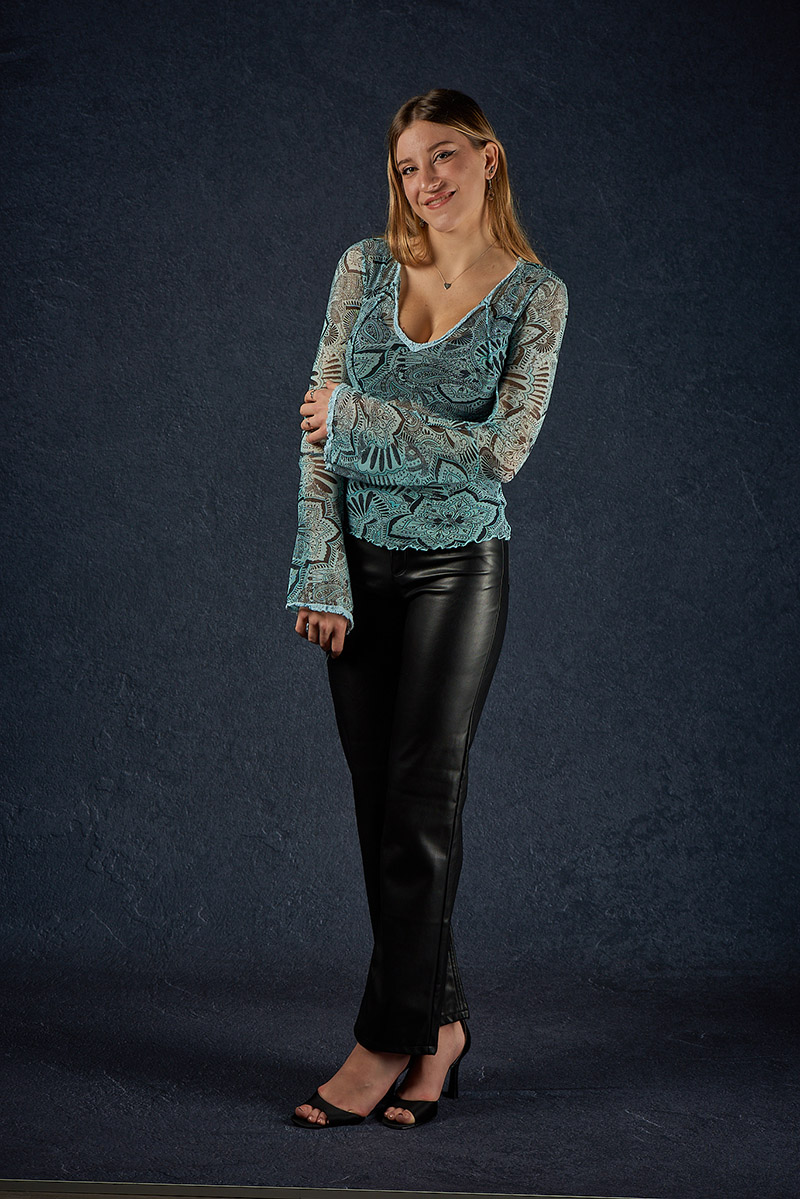
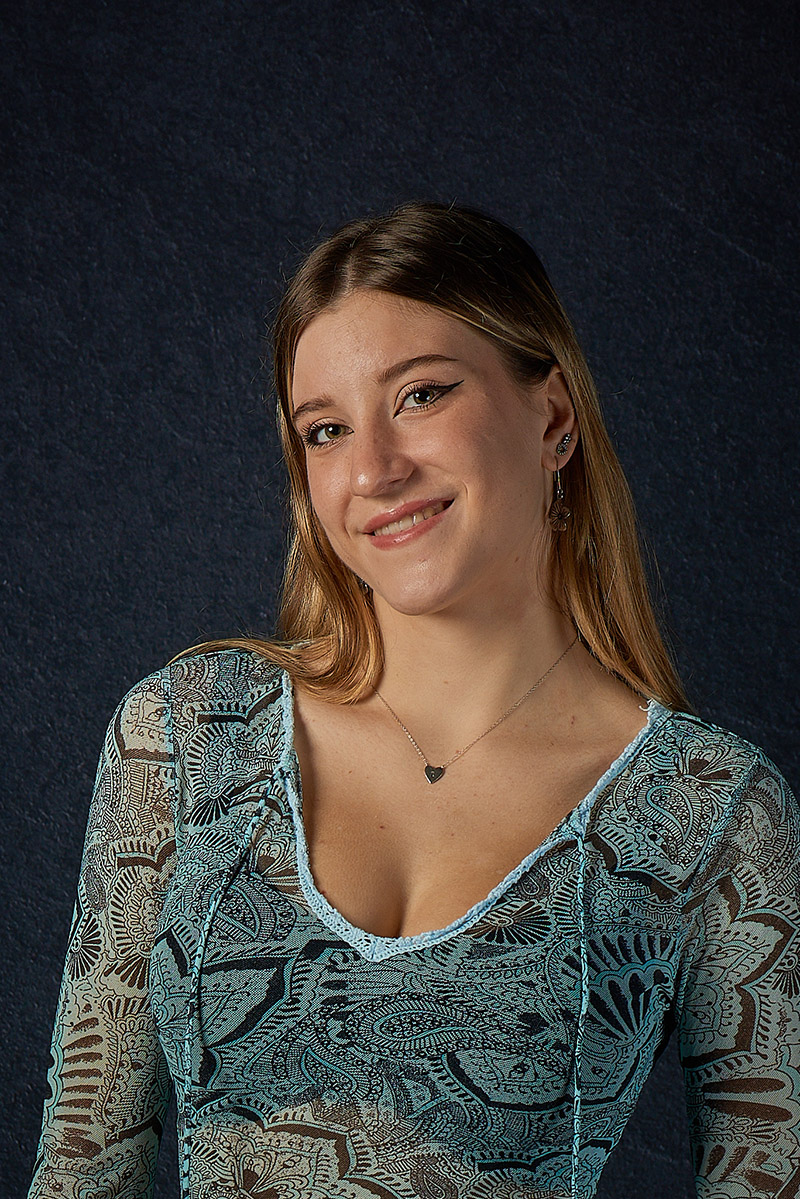
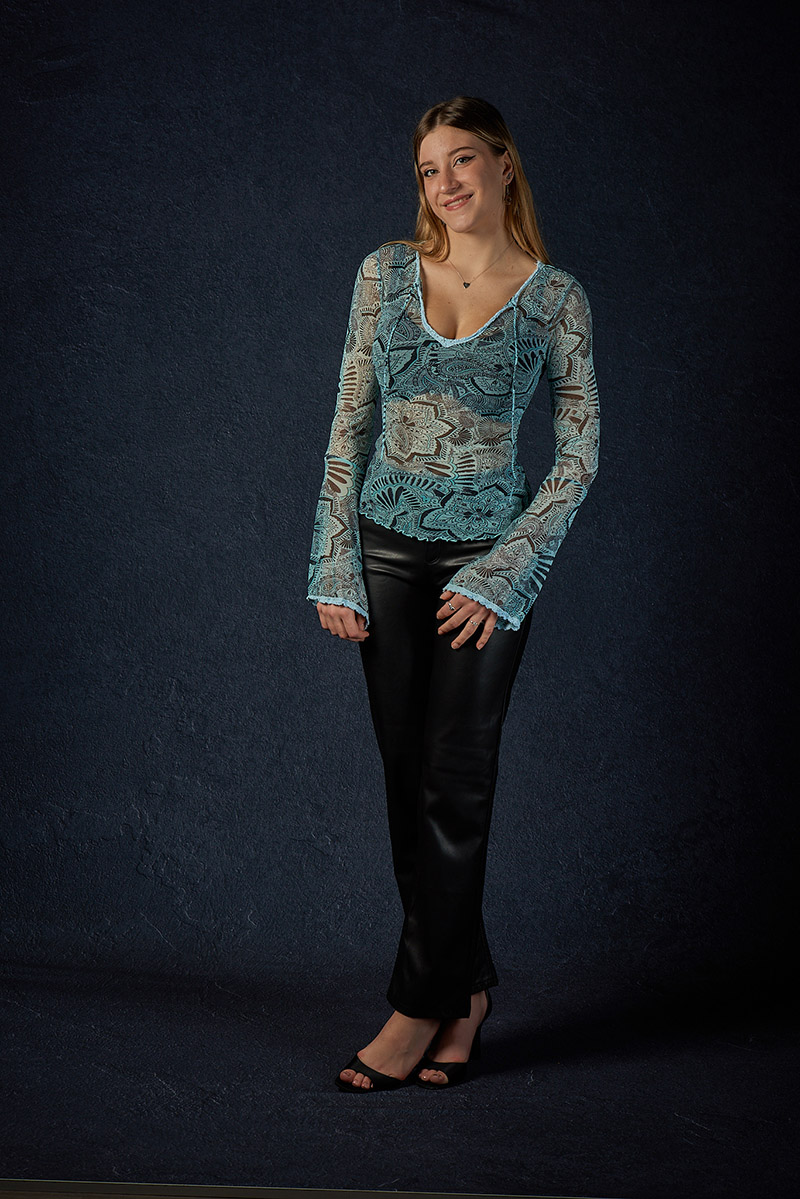
The first setup is fairly simple and one I see many new studio photographers use. The Key light with the Deep Octa remains camera left. I’ve added a second FIVE, this time with the 50×130 Strip Box camera right as a Fill light. Both lights are about 45º from Maya.
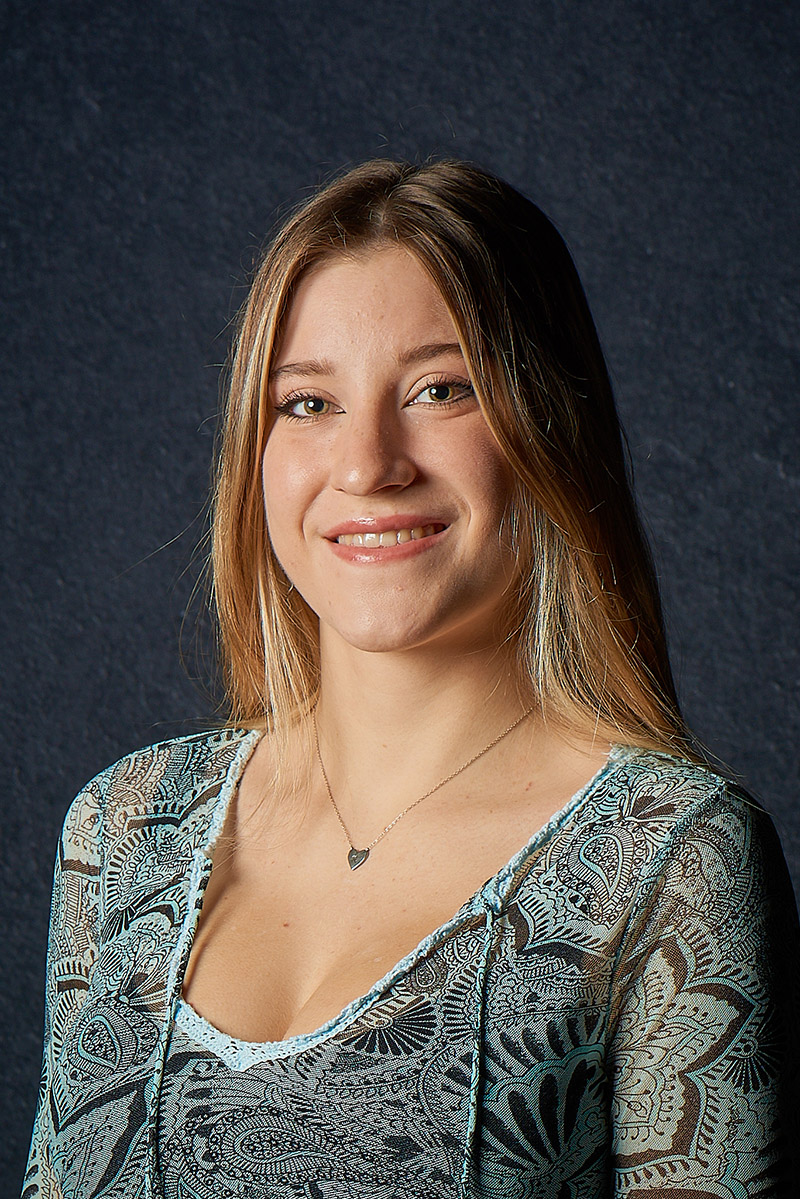
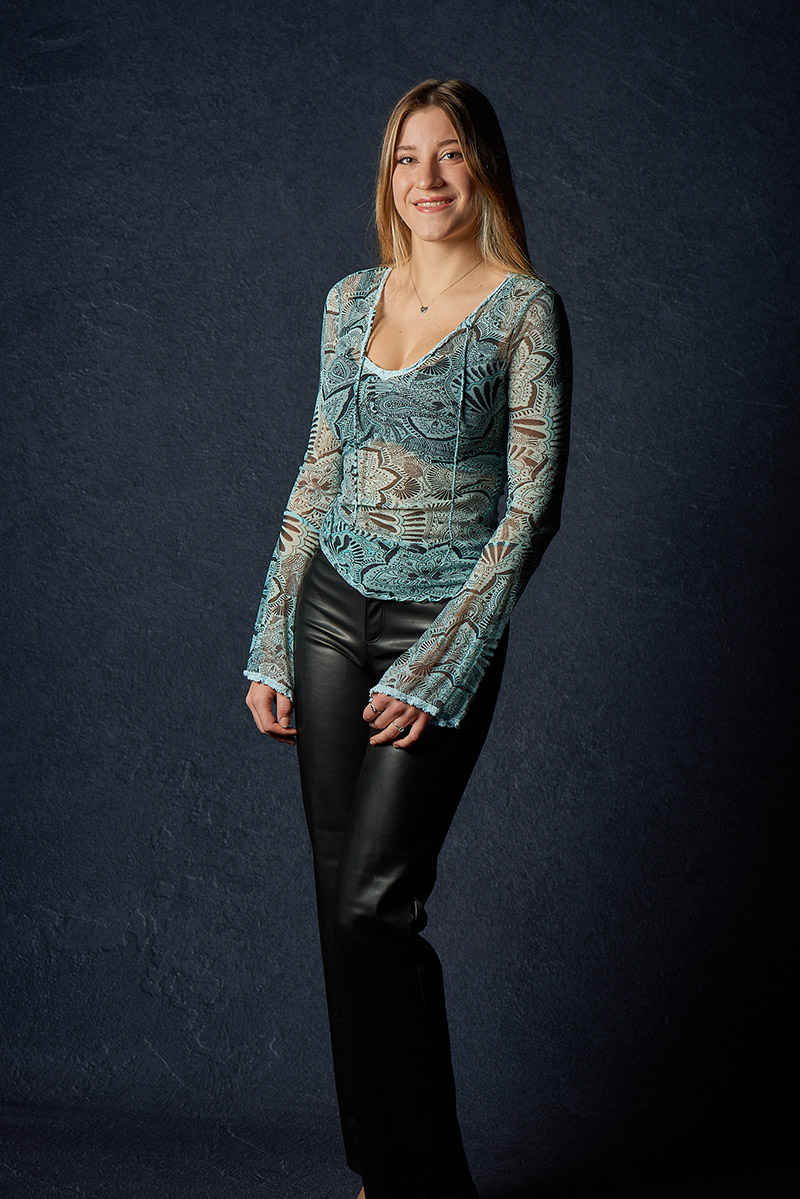
This isn’t a recommended use for a Strip box, as it looks just like any other softbox as a Fill. For learning studio photography, this setup is fine. It’s not ideal and here’s why: the light on Maya is flat and uninteresting – there’s no shape or sculpting. I do like the highlights on her pants so they’re not just a sold black blob and the highlights in her hair look nice. But overall, this is kind of boring and, if you’re an “experienced” studio photographer, lazy. Try this for the first couple of times and then start moving your lights around more. If you’re taking portraits of Real Estate agents, stop doing this. Just stop! Unless you have a good reason for flat lighting (such as fixing bad complexion or reducing wrinkles), try not to do this.
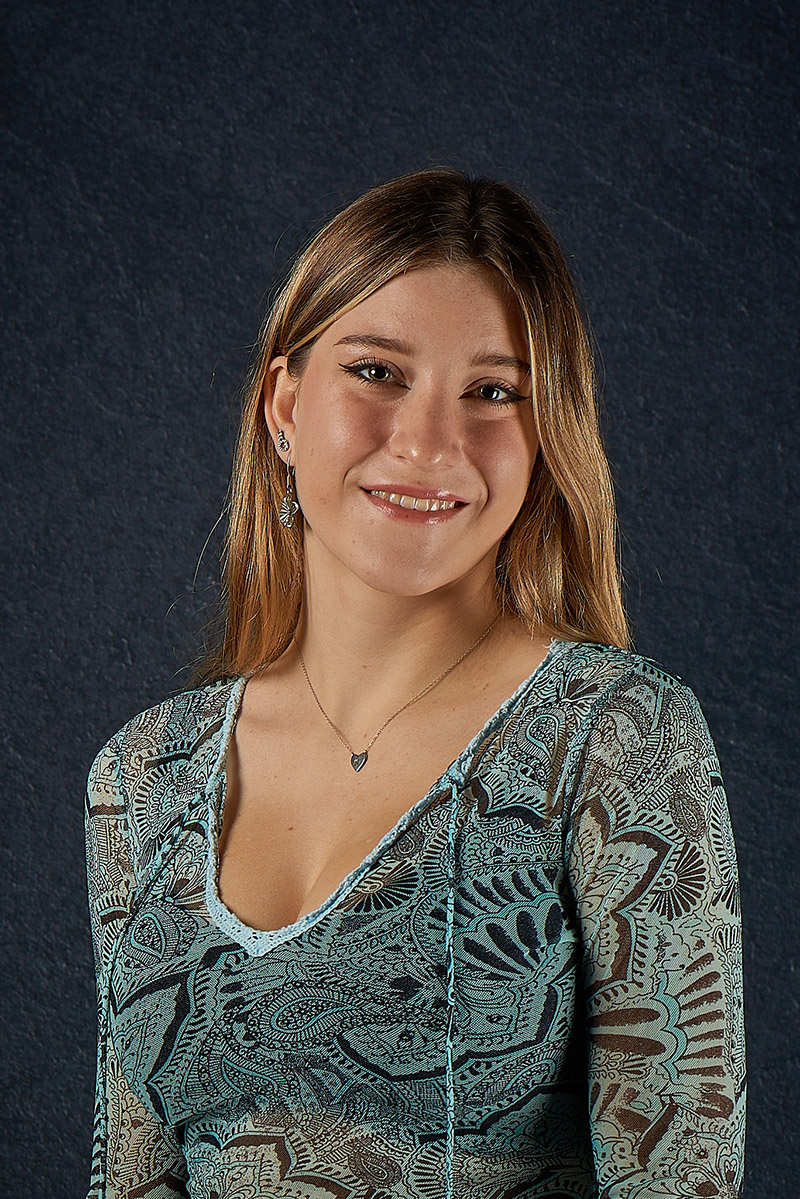
A simple modification of the flat light setup is to cut the power of your Fill – start with ½ stop and go down from there. I also find turning your model AWAY from the Fill can also create more interest and flattering shape. Let your Key light do it’s job – be the main source of light for your portrait. We still have the nice shine on her pants and hair and the light is still somewhat flat, but it’s overall a much better portrait.

If I move the Strip box further to the right, the light becomes less flat. We’ve got nice shadows shaping Maya’s face. This is a nice and easy modification to add some character to your portraits.
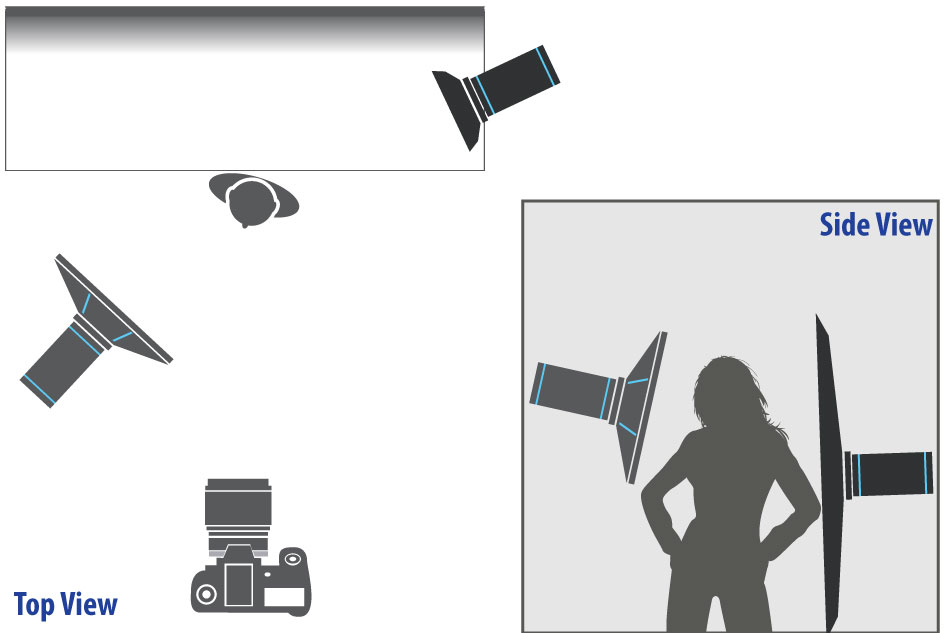
Let’s take our Strip box and move it behind Maya – in line with the Key light. This removes the flat lighting. Used as an edge light, the Strip box creates separation between Maya and background. The large 130cm Strip creates this edge light from her hair down to her calves. We still have some detail on the pants. The Edge light sculpts her jawline. This lighting really adds dimensionality and character to the portrait. The issues are that the Strip spills some light onto the background and there was a risk of glare into the lens from the Strip being aimed back at the camera.
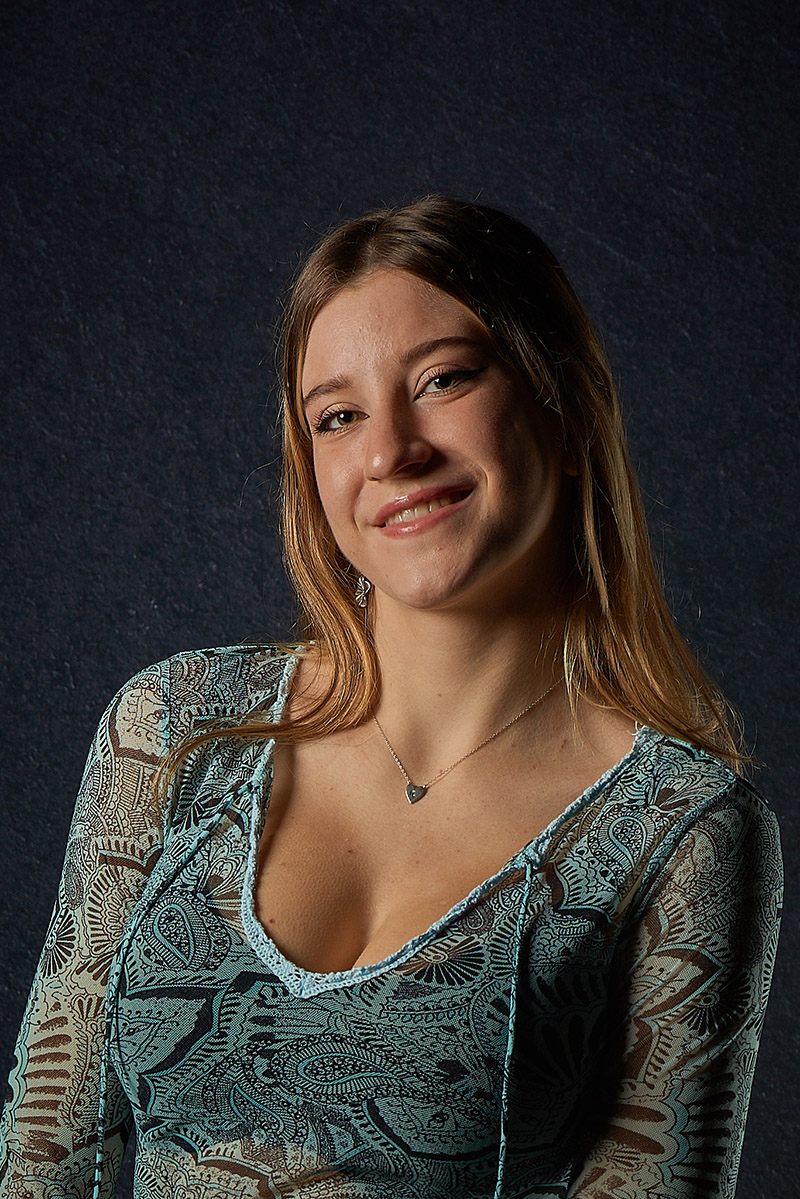
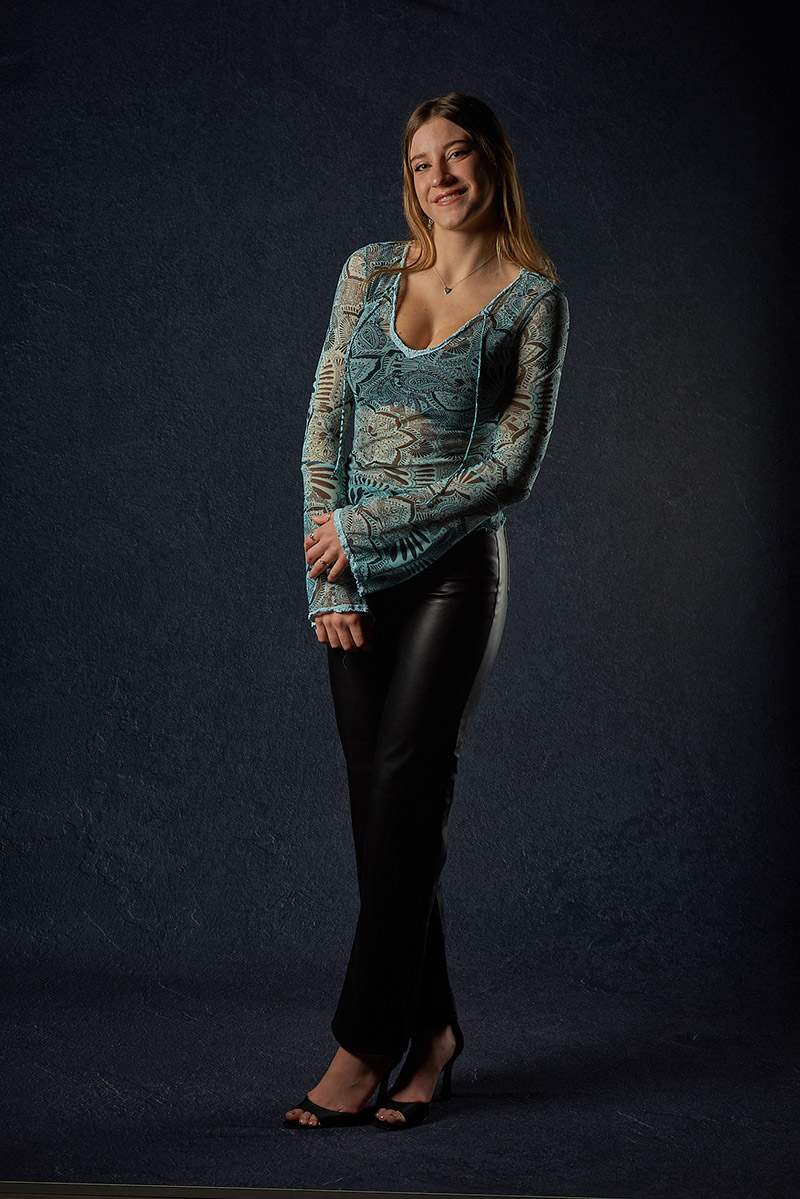
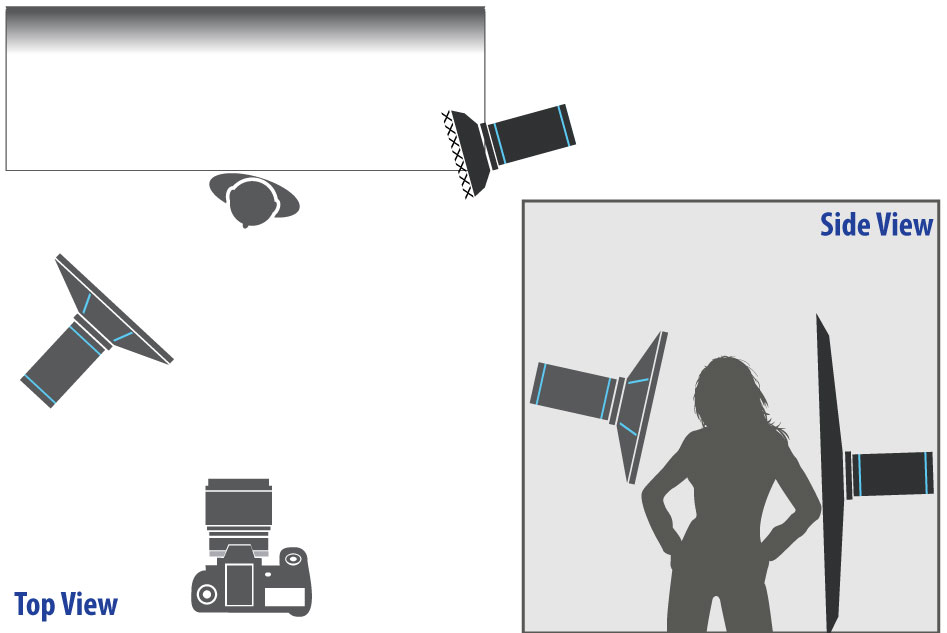
This where grids come to your rescue. I added the textile grid to the Strip box and moved the Strip just a bit more towards the camera. I still have that nice separation of Maya from the background and the nice shaping and sculpting of the light around her. I don’t have that annoying spill on the background and the adjustment of the light position has prevented any spill into the lens, which can cause flaring.
To summarize, moving your lights requires some understanding of what will happen when and where you move those lights. Flat lighting is okay when you’re learning or for specific cases, such as minimizing imperfections and blemishes. But if you want to give your portraits character and shape the features of your subject, moving your Fill light behind them and using a grid to prevent spill give you more control over your light. More control over your light leads to more interesting images.
Share some of your favourite images where you used Fill light to your advantage on our Facebook page or tag us on Instagram #photonewscanada #elinchromlightshaper.
Next month, I’ll show some simple three-light setups and the results. See you next month!
Read the previous articles:
Elinchrom Light Shapers and Lighting Techniques – #Episode 1
Elinchrom Light Shapers and Lighting Techniques – #Episode 2
Elinchrom Light Shapers and Lighting Techniques – #Episode 3
Elinchrom Light Shapers and Lighting Techniques – #Episode 4
Elinchrom Light Shapers and Lighting Techniques – #Episode 5
Elinchrom Light Shapers and Lighting Techniques – #Episode 6
Elinchrom Light Shapers and Lighting Techniques – #Episode 7
Elinchrom Light Shapers and Lighting Techniques – #Episode 8
Elinchrom Light Shapers and Lighting Techniques – #Episode 9
Items Discussed
Author: Will Prentice

A portrait, fine art and commercial photographer for 30 plus years, Will Prentice is not just a contributor to PHOTONews magazine, but also host of PHOTONewsTV, owner of Captura Photography+Imaging and Technical Support/Brand Manager for Amplis Foto, Canada’s largest distributor of photographic equipment.
Will teaches photographers of all skill levels how to improve their craft – from creative photo projects to picking the right gear for their needs to flattering lighting to getting the best expressions to creating final images for screen and print. His unique style of highly detailed images with perfect tonality, wide dynamic range and stunning colour is instantly recognizable. Commercial clients rely on Will’s creative eye and mastery of lighting.
When he’s not behind the camera or in front of a class, you’ll find Will outdoors in any weather – usually on one of his bikes or enjoying time with his grandchildren.