As a followup to the Ambient Light Article in the Winter 2011 issue of PHOTONews Magazine, we offer some help with changing the settings on your camera to maximize your shooting.
Are you confused by some of the technical terms used in the Ambient Light article in the magazine? What is ISO? How do you change your shutter speed? What does White Balance mean? This follow-up guide should answer some of those questions with many of the popular cameras out there. If yours isn’t mentioned, there’s a very good chance that many of the instructions will be similar.
Canon EOS Rebel T3i


Changing ISO
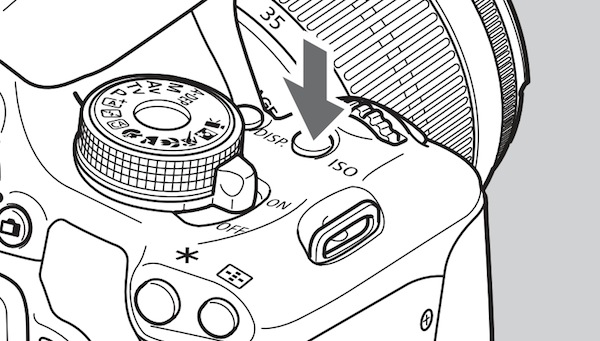
The ISO button is located on the top of the camera, directly behind the shutter button and the main dial. It is marked with the label “ISO“.

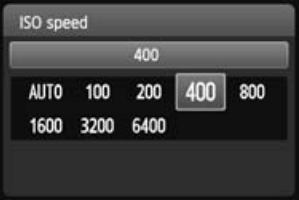
 To change the ISO, press the ISO button. An ISO settings screen will appear on the rear of the camera. Using the main dial (located right behind the shutter button), select the desired ISO value, then press the “SET” button to confirm the selection.
Changing the shutter speed in Shutter Priority (Tv) Mode
To change the camera mode to Shutter Priority, rotate the Mode Dial to the “Tv” position. The “Tv” on Canon cameras refers to “Time Value“. Once in Shutter Priority mode, rotate the Main Dial to change the shutter speed. The rear LCD screen will display the changing shutter speed as the Main Dial is rotated.
Changing the Aperture in Aperture Priority (Av) Mode
To change the camera mode to Aperture Priority, rotate the Mode Dial to the “Av” position. Once in Aperture Priority mode, rotate the Main Dial to change the aperture. The rear LCD screen will display the changing aperture as the Main Dial is rotated.
Manual Mode
Manual mode is denoted by the “M” on the Mode Dial. To change shutter speed while in Manual mode, rotate the Main Dial until the desired shutter speed is chosen. To change the aperture, rotate the Main Dial while holding the “AV +/-” button, until the desired aperture is chosen.
White Balance
 To change the White Balance, press the “WB” button. The rear LCD screen will display several options. Select the desired white balance setting and press the “SET” button to confirm the selection.
Canon EOS 60D


Changing ISO
The ISO button is located on top of the camera in front of the information LCD panel. it is marked with the label “ISO“. To change the ISO, press the ISO button. The information LCD panel will display the ISO as it is changed using the Main Dial (the small dial located behind the shutter button).
Changing the shutter speed in Shutter Priority (Tv) Mode
With the Mode Dial set to “Tv” mode, rotate the main dial until the desired shutter speed is reached. The information LCD panel on the top of the camera will display the shutter speed value.
Changing the aperture in Aperture Priority (Av) Mode
With the Mode Dial set to “Av” mode, rotate the main dial until the desired aperture is reached. The information LCD panel on the top of the camera will display the aperture value.
Manual Mode
With the Mode Dial set to “M” mode, rotate the Main Dial to change the shutter speed and the Quick Control Dial (the large dial on the rear of the camera body) to change the aperture value. The information LCD panel on the top of the camera will display the values as they are changed.
White Balance
To change the White Balance on the 60D, press the “Q” – Quick Control – button (located directly above the Quick Control Dial on the rear of the camera body). Using the Multi-controller (the directional selector located in the middle of the Quick Control Dial), navigate to the white balance option. Turn the Main Dial or the Quick Control Dial to change the setting.
If you would like to download the manual for your camera, click the appropriate link below:
Sony Alpha a35/a55/a65


Changing ISO
The ISO button is located on the rear of the camera and is marked with the label “ISO“. To change the ISO, press the “ISO” button and use the directional keys to select the desired ISO value. Press the centre button, labelled “AF” to confirm this selection.
Changing the shutter speed in Shutter Priority (S) Mode
With the mode dial set to “S” mode, rotate the Control Dial (located on the front of the camera below the shutter button) until the desired shutter speed is reached. The shutter speed value will be displayed on the rear LCD monitor.
Changing the aperture in Aperture Priority (A) Mode
With the mode dial set to “A” mode, rotate the Control Dial until the desired aperture is reached. The aperture value will be displayed on the rear LCD monitor.
Manual Mode
With the Mode Dial set to “M” mode, rotate the Control Dial to change the shutter speed. To change the aperture, hold the Exposure button (located to the right of the silver “Movie” button and marked with “+/-“) and rotate the Control Dial until the desired aperture value is reached.
White Balance
The White Balance button is located on the rear of the camera and is marked with the label “WB“. To change the White balance, press the “WB” button and use the directional keys to select the desired White Balance. Press the centre button, labelled “AF” to confirm this selection.
If you would like to download the manual for your camera, click the appropriate link below:
Nikon D3000/D3100

Changing ISO
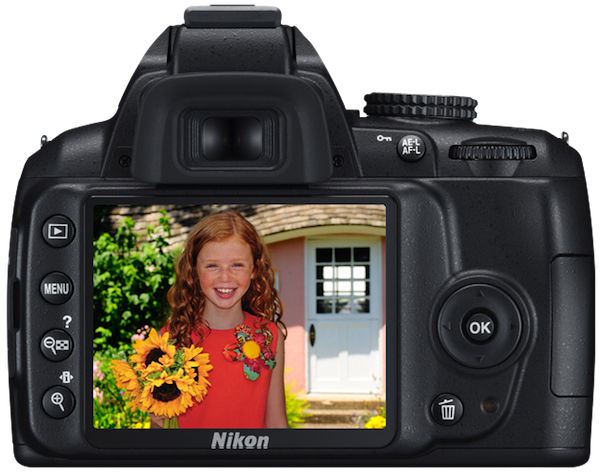
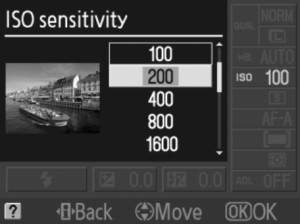
The ISO setting is located within the menu brought up by the “Information Edit” button, which is denoted by an “i” inside chevrons (< i >). Press the Information Edit button and navigate to the ISO value setting. Press the “OK” button to enter the ISO setting menu. Next, use the directional arrows to select the desired ISO value, and press the “OK” button once again to confirm.


Changing the shutter speed in Shutter Priority (S) Mode
With the mode dial set to “S” mode, rotate the Command Dial (located in the upper right area on the rear of the camera body) until the desired shutter speed is displayed on the rear LCD monitor.
Changing the aperture in Aperture Priority (A) Mode
With the mode dial set to “A” mode, rotate the Command Dial until the desired aperture value is displayed on the rear LCD monitor.
Manual Mode
With the mode dial set to “M” mode, rotate the Command Dial to change the shutter speed. To change the aperture, hold the Aperture button (located on the top of the camera just behind the shutter button, and marked with “+/-“) and rotate the Command Dial until the desired aperture value is reached.
White Balance
The White Balance setting is located within the menu brought up by the Information Edit button. Press the Information Edit button and navigate to the “WB” value setting. Press the “OK” button to enter the WB setting menu. Next, use the directional arrows to select the desired White Balance setting, and press the “OK” button once again to confirm.
If you would like to download the manual for your camera, click the appropriate link below:
| PHOTONews on Facebook | PHOTONews on Twitter |


