With a camera and flash you can unlock the mysteries of nature. With technologies like HDR, the camera starts to become expert at reproducing what the eyes can see. Sometimes the camera is much better at recording images than your eyes, and that is the case with high-speed flash photography.
I’m sure you have seen Professor Edgerton’s classic high-speed photos of glass breaking, water splashing, a bullet passing right through an apple and other subjects which occur at speeds that are much too fast for the human eye to register the image. While some of these photos are possible only in the physics lab, with a bit of thought, you can apply the principles of flash photography to many situations. Stopping high-speed motion with flash is not only a challenge – it can be great fun.
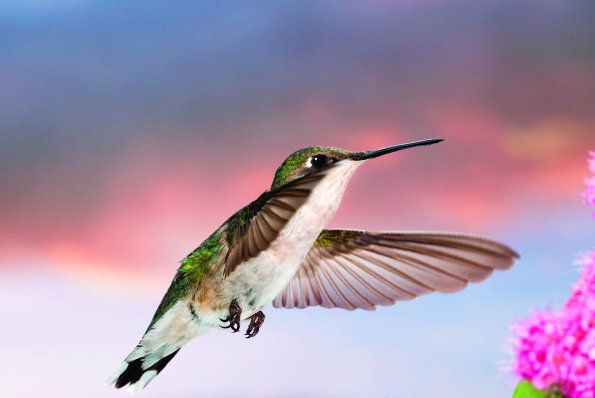
Yes, I said stopping the motion with flash, not shutter speed. I do a lot of nature photography, and over the years I have used highspeed flash techniques to freeze the movement of a hummingbird in flight. Something the eyes can’t do – but with a good camera, flashes and some relatively simple techniques, you can capture images that occur at speeds beyond the capacity of human vision.
To take photos of hummingbirds, you need… you guessed it – a hummingbird. It is well known that hummingbirds are found just about everywhere in North America during the summer, and they migrate south in the winter.
As soon as spring shows its’ colours in Canada, you should get ready to make your hummingbird studio set-up. The beautiful males are the first to arrive at their northern nesting grounds. To attract hummers, you need a feeder with nectar. You can find them at pet supply stores at very reasonable prices. Choose a hummingbird feeder with a perch for your new friends to stand and relax while drinking the nectar you will prepare for them. The little fellows work very hard and they need to rest frequently.
To make the nectar, mix one part sugar with four parts water in a saucepan and bring it to a boil. As soon as it has boiled, take it off the stove and place the nectar in the refrigerator until it is cold. You can keep extra nectar in the fridge for another time. It is important to change the mixture every week, clean the feeder with warm water only, and make sure that no insects can get to the feeder.
When there are hummingbirds in the area, they will find your bird feeder, and with a bit of luck, you will see a new friend coming by for a snack – at first, you will only see a flash of colour as the bird surveys the area, and once it seems to be safe, you will hear a cool buzz around the feeder.
It’s time to take some photos!
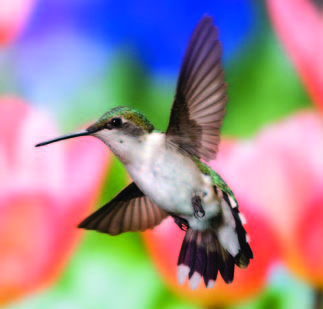 We have all learned that to stop action with a camera, you have to raise the shutter speed, open the aperture, and raise the ISO to the roof – which also reduces the depth of focus. That approach to stopping action can work to some extent, but there are disadvantages when photographing small subjects at close range – the high ISO will bring lots of noise, and with the shallow depth of field, it will be almost impossible to get the whole little bird in focus.
There is a solution to the enigma of hummingbird photography – high speed flash photography! The idea is to use the extremely short duration of the flash to stop the motion, not the shutter speed!
I own professional cameras and lenses, but this technique can be used with many of the mid-range cameras and lenses.
I personally like to use a Canon Mark III 1DS with a 300mm 2.8 IS lens and a 20mm Kenko extension tube to be able to focus at close range. At the beginning of the hummingbird season, before the bird has a chance to get used to the presence of my set up and the flashes, I shoot from farther away, adding a 1.4 extender to the telephoto lens.
I use Canon Speedlites, but any flash with manual setting will do. When used in manual mode, low setting means very short duration of the light, the drawback of this low-power setting is that you need several flashes, and you need them to be quite close to the bird feeder. My research into the flash duration of the various settings available for my flash units indicated that 1/16 power = 1/15,000 second, 1/32 power = 1/19,000 second, 1/64 power = 1/31,000 second, and 1/128 power = 1/35,000 second. So if you place your flashes on manual setting at 1/32 (this is what I recommend), you will stop the action at around 1/19,000 of a second! But the flash range will only be around 2-3 feet – the solution is to have many flashes.
Camera setting: manual mode, ISO 100 to 250, flash sync speed at 1/250 of second and lens aperture f/11 to f/22. People often ask me about the shutter speed – yes, if you don’t use flashes, the combination of 1/250 second and f/22 at ISO 200 will produce an image that will be very dark! You have to rely on the output of the flashes to illuminate the scene, and the very short duration of the flashes to stop the action. This is the principle of highspeed flash photography.
For my Canon set-up, the flashes are triggered by ST-E2 on-camera, or a master flash like a Canon 580 EX. All the other flashes are set on slave mode. You can use radio slaves, or optical slaves to trigger your flashes – test them in the actual setting to be sure that the optical slave triggers will work in relatively high ambient light. You may have to aim the slave sensors toward your main flash, and in very bright light, you may have to make a small “hood” to keep some of the ambient light off the slave sensor.
For the backdrop, you can use a photo, a plant, or anything colourful. When I use a photo, I like to blur it a bit in Photoshop before I print it, because it is placed quite close to the perch, and when I set the lens to a very small f/stop to achieve the greatest depth of field, the background will also be clean and almost in focus, which does not look very natural. My solution is to take the background image, blur it in Photoshop, and then print it; this is the secret of the great bokeh, which in reality is a simulation.
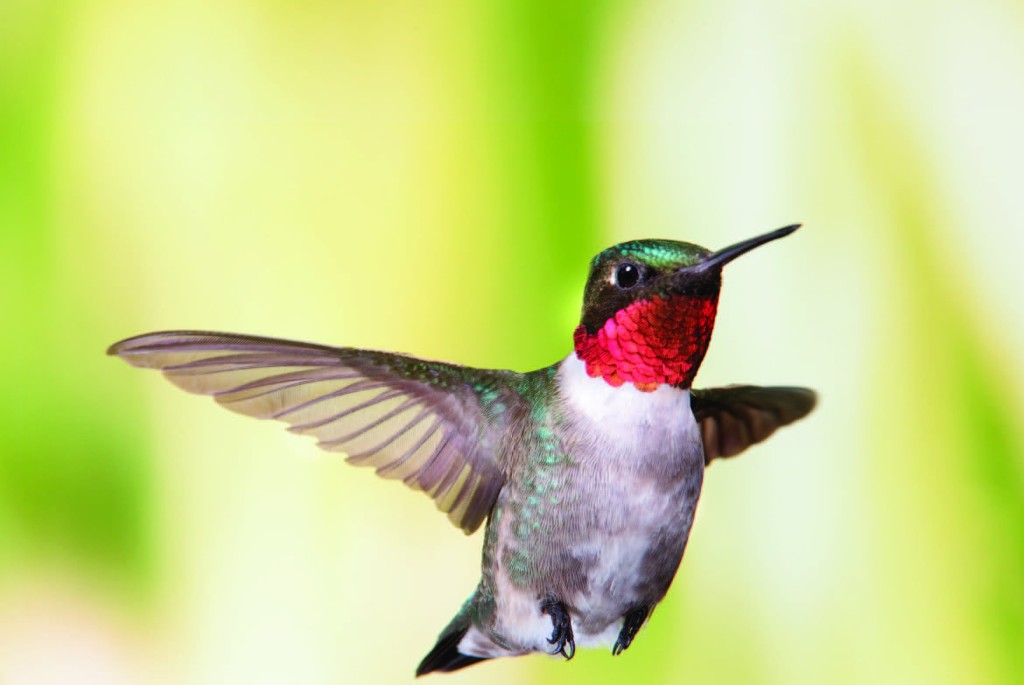
Flash placement for the hummingbird set-up is just like any studio photography set – with one exception – you want to have a bit more light coming from a low angle to illuminate the throat of the hummingbird, which is always impressive when the feathers are shinning.
I have read technique tips from many bird photographers who sit in a camouflage blind and wait for the birds to fly in for a visit. This technique can certainly work, because the birds are not really afraid of us, and my experience shows that if you use a blind, it will make your task easier. After a couple of weeks, however, the hummingbirds will be your friends and they will come to visit you even when you are adjusting your flashes or when you are changing their nectar. It is always a thrill to see your friend sitting on a branch just a few feet away from you, patiently waiting for you to be done so they can approach the feeder. Make sure to give them enough time to feel at ease with your presence – let them eat for a while before taking any pictures. If the flashes scare them, go easy, and they will progressively get used to the interruption. In spring, females are very active before they get ready to have their babies, it’s a great time to take photos, but make sure that there is plenty of nectar in the feeder.
You will not have the opportunity to experiment once the birds arrive on the set, so take some test shots of the feeding port where you expect the bird to hover, and correct the exposure as necessary. I use the feeder as a target to get my exposure right. Take a look at the shot of the outdoor hummingbird set, and you will see that I cover the side of the feeder with a flower – it looks better in the photos. I also use Scotch tape (when I am getting ready to take photographs) to cover the three other openings on the feeder, forcing the hummingbirds to use only the front feeding port.
Positioning Your Slave Flashes:
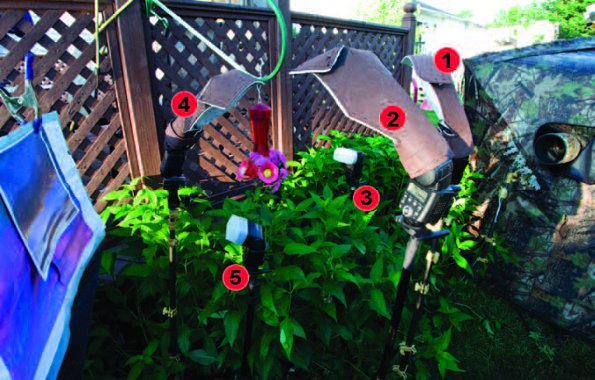
- Main Light – just over the camera
- Fill light
- From under a little, the throat light
- Back light or hair light
- Background light (1 or 2 flashes)
All of these flashes are placed about 24-30 inches from the portion of the set that they will illuminate
The diffusers for the flashes are homemade, very cheap and they produce the best results to my knowledge. I found the pattern for the flash diffusers on the internet. Flash diffusers are not mandatory for this type of work, and bare flash works very well also.
I use manual focus to make sure that the bird’s head is in focus. This is not so easy, but your skills will improve with practice, and this is a great way to develop the manual focus technique… auto focus will often be thrown off by the extremely fast wing movement.
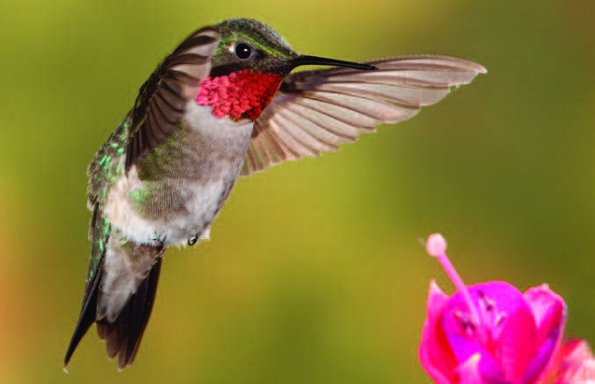 After a bit of experimentation with the placement of the flashes, and test shots to check your exposure and focus technique, you are almost ready for action.
Now you have to sit back, be very quiet and wait for the birds to arrive.
You have to wait for the defining moment to trip the shutter. I always let the bird drink first, then when they back off a bit and hover it’s time to tweak the focus and take the picture.
Some hummingbirds will react to the light, and some don’t seem to be bothered by it at all – I have had different reactions from hummingbirds with the flashes. Go slowly and progressively; let the bird get used to the flash. Even if they are startled by the flash or the sound of the shutter, they always come back for nectar, and the summer is long, so don’t be in a rush to take the pictures – it would be a shame to scare your new friend away, when a patient approach will result in a summer filled with photo opportunities.
I like to take the photos early in the morning or at dusk, when the birds are active and I don’t want the sun to interfere in my setup. If you get too much ambient light, the sensor will catch some of the ambient and you will have a ghosting effect. Five lights to calibrate are enough of a challenge, so if I decide to take some pictures during the day I often use a patio umbrella to cover the set.
With a bit of luck, and a lot of careful planning and practice, you will capture some extraordinary images. When you use so many light sources, you can expect that there will be a bit of work to be done to fine-tune the pictures – you may have to erase the reflections of two or three of the flashes if the hummingbird’s eye catches the light, but this can easily be done with a bit of Photoshop magic, and then…voilà – a masterpiece!
Be creative, use different backgrounds, and add flowers and colours to your set. If you are patient, the reward will be huge… hummingbird photography is addictive, so beware, I warned you!
If you treat your hummingbirds well, it is quite likely that you will see some babies coming to your feeder at the end of the summer… and that is the greatest thrill of all.
If you have any questions on hummingbird photography, just send me an email – It will be my pleasure to help.
Article by Michel Roy
| PHOTONews on Facebook | PHOTONews on Twitter |


