 |
| CB60S and CB60W |
In a previous article, we looked at hard light and soft light and a few methods of controlling light. Today, I’ll explain one of my new favourite light modifiers and help you move from taking photos to making photographs.
We have a companion video for this article, which you can watch on YouTube at PHOTONewsTV.
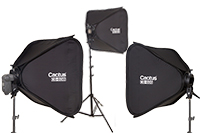
Whenever a photographer mentions a softbox, we immediately think of soft light with smooth transitions in the shadows. Cactus recently announced their CB60S and CB60W softboxes for speedlights. These are available with either a Silver (S) or White (W) interior.
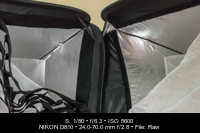 |
| CB60S compared to CB60 |
Just like the original CB60, the new S and W softboxes include a speedlight holder that clamps by the speedlight head, a 60cm x 60cm softbox and two diffusion panels. In addition to the original, the new softboxes include a grid that velcros into the front for even more light control (for those wondering, the grid will not fit. If you look at the product photo, you can see the velcro strip is wider on the new softbox). The materials of the new CB60S seem to be of higher quality.
I’ve got a CB60S with the silver interior. The CB60W will produce slightly softer light; the CB60S will create more contrast.
I’m using a Nikon D810 with the Tamron SP 24-70mm, Cactus V6 Wireless Flash Transceiver, Cactus RF60 Wireless Flash and Gossen Digisky flash meter. I’m using the flash meter for every shot and adjusting the power output of the flash so every photo is taken at ISO64, 1/250s and F/8.
My model, “Queenie”, is positioned about 6 inches in front the backdrop so we can see the interplay between light and shadow behind her, as well.
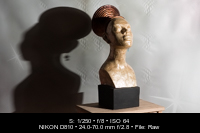 |
| CB60S – no diffusion |
Let’s start with just the silver softbox.
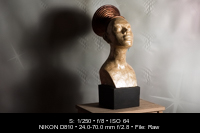
The shadows are very distinct and transitions harsh. The softbox alone creates a look similar to a beauty dish, but lacks the central reflector of a beauty dish that would soften the light at all. If you need to throw a lot of light, this is one way of doing so.
My Cactus RF60 was set at 1/4 power to get F/8 from 2 feet away.
 |
 |
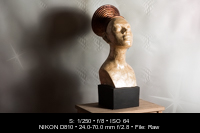
| CB60S – Inner Diffuser and plus Grid | |
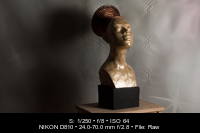
Adding just the inner diffuser greatly softened the light – especially the shadow falling on the background. Adding the grid reduces the spill onto the background – making the light more directional but not adding a lot of harshness.
The inner diffuser costs 1/2 stop of light – I was at 1/4 +5 on my RF60 to get F/8 from the flash. The grid was costing me another 1/3 stop, so I had to adjust the flash to 1/4 +8.
 |
 |
| Both Diffusers and plus Grid |
|
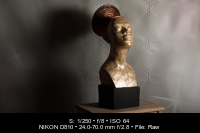
For the softest overall light, both diffusers are used. The overall tone of the image is softer and the transitions from light to shadow are beautiful. Facial lighting – the short loop lighting – is perfect. The shadow falling onto the background isn’t displeasing.
Adding the grid reduces the spill onto the background even more and directs a bit more of the light onto the face. Contrast is just a touch higher with the grid. Adding the outer diffuser costs an additional 1/2 stop of light – I was at 1/2 on my RF60 to get F/8 from the flash. The grid was costing me another 1/3 stop, so I had to adjust the flash to 1/2 +3.
What does all this mean and how is it practical? The CB60S and CB60W are extremely versatile – just like any softbox. The ability to add or remove diffusers lets you get the quality of light you’re after, and the addition of the grid creates a “directional soft light” with a bit more contrast – pleasing light for most portraits.
Stay tuned for the next article on the colours of light shapers.
Share your best photos on our PHOTONews Facebook Page and on the PHOTONews Flickr Image Pool.

About the Author – Will Prentice (www.capturaphoto.ca) is a professional photographer based out of Whitby, Ontario and Brand Specialist – Lighting for Amplis.


