Macro photographers can often control large components of their compositions, from choosing a different background to a dramatic lighting change with a flashlight and a flick of the wrist. All the world’s a stage, but a macro photographer’s theatre is often smaller than one square foot. While some strive to capture only the most documentary images that describe the universe at our feet, others decide to play the role of a sculptor.
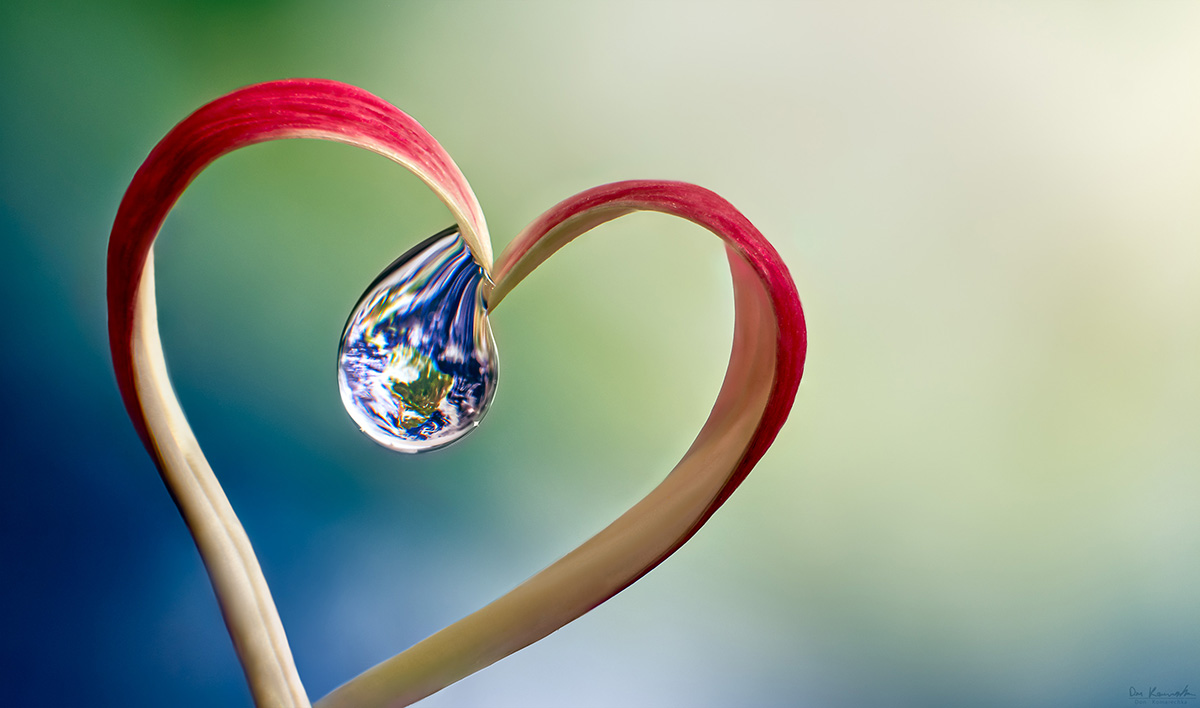
When exploring the natural world, you might discover the hidden secret of water droplets: they act like lenses. Water droplets will refract an image of whatever is placed behind them, from a forest scene depicting the trees in behind, to a deliberately placed flower that fills the droplet.
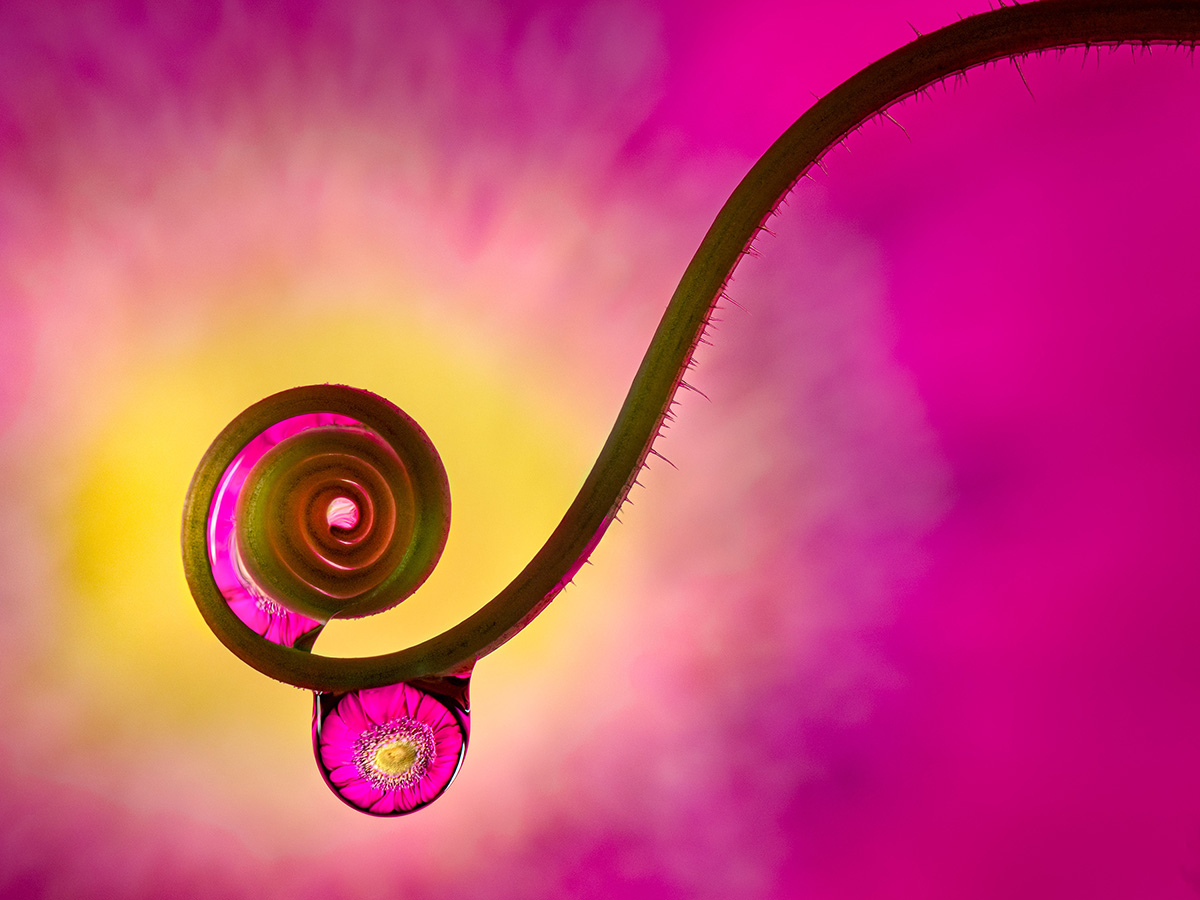
ISO 200, 1/250sec, F/8 shot with Laowa 50mm F/2.8 CA-Dreamer Macro 2X lens
First, we explore the anatomy of a droplet. The more spherical it is, the more it will act like a lens. That’s not to say it can’t be effective in other forms; the droplet inside the spiral of this cucumber vine tendril is absolutely not spherical and provides a distorted view of the flower as light passes through it. That distortion has its own charm, adding a spiral of magenta colour to the green tendril. Photography is often the combination of such lines and colours that draw our eye around the frame.
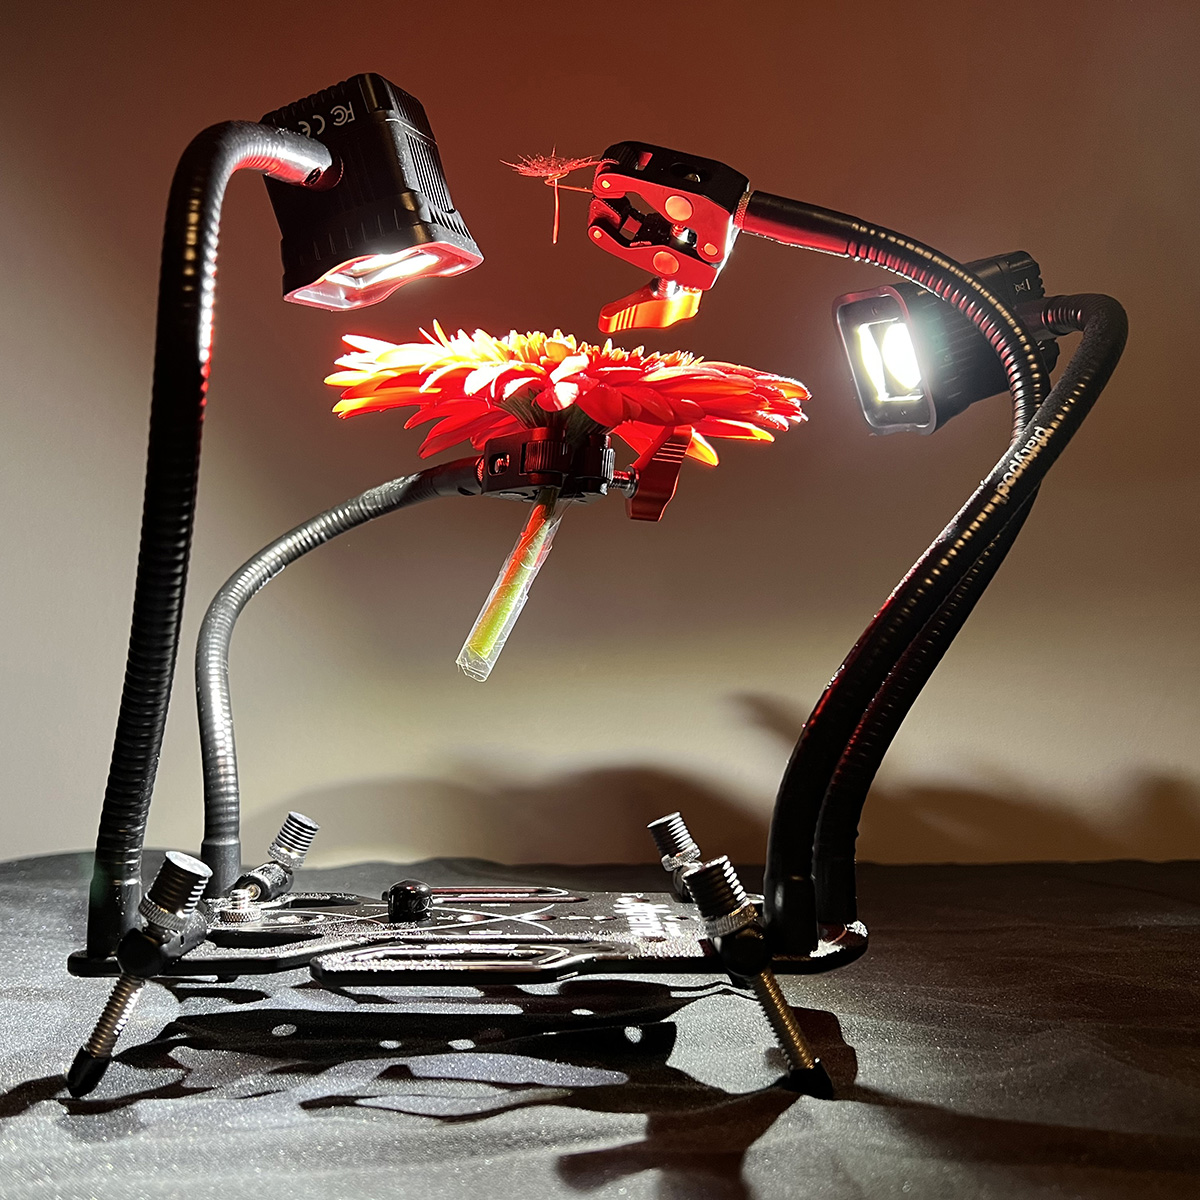
Next, let’s take a look at a basic setup. Keep it simple to start and see where we can go:
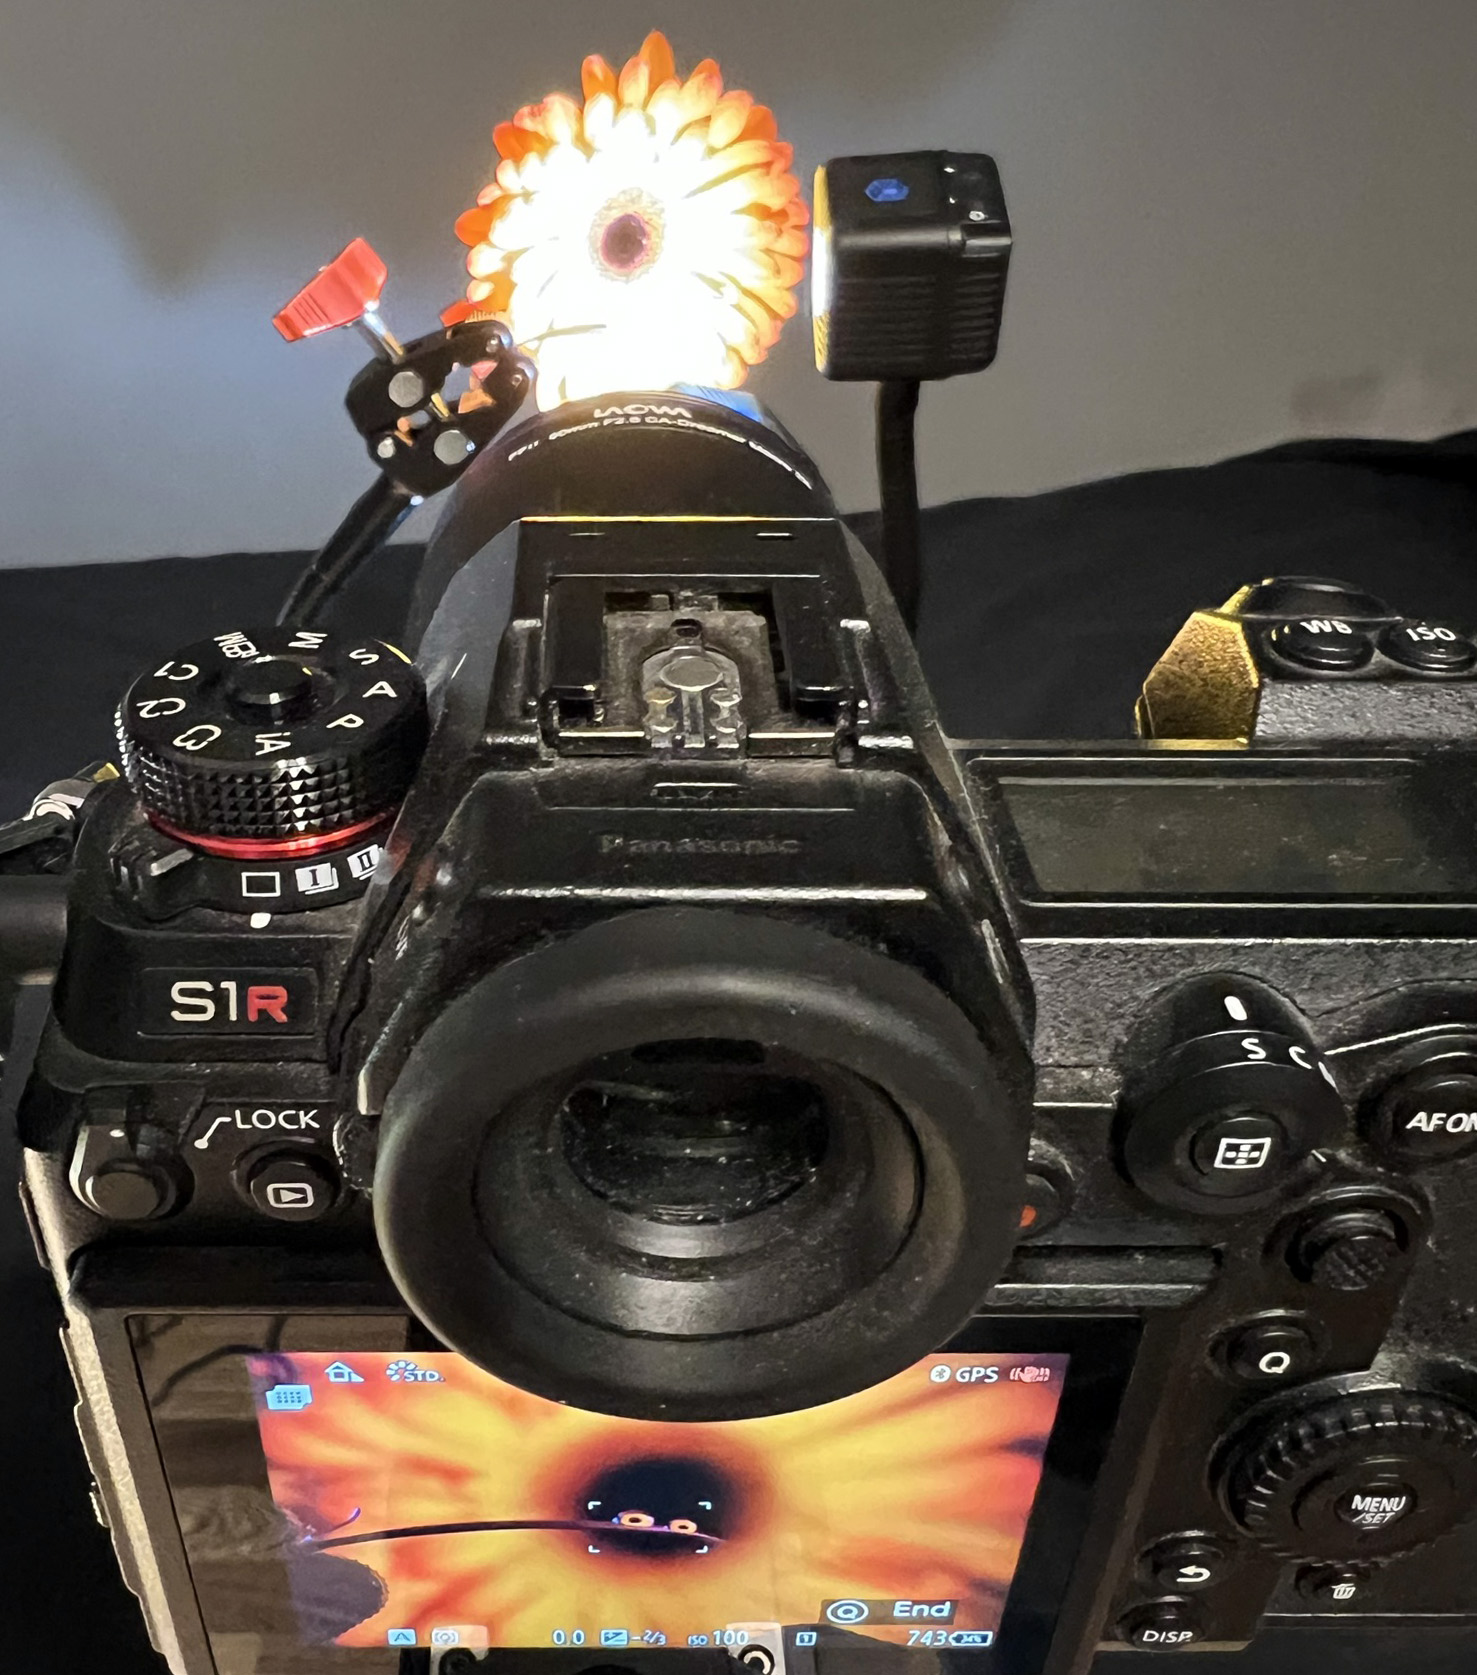
This configuration is about as simple as you can get: a clamp holds a flower petal, the Gerbera Daisy is position in behind, and the lighting is on the side, positioned more on the background than the foreground petal. The droplets are put in place with a blunt-tipped needle and syringe, which is an exceptional tool easily purchased online. Continuous light often works best, with a single-diode light source to limit the catch-lights on the sphere of water.
You will notice that the framing on the camera is far away. This image was taken with the “High resolution” mode on the Lumix S1R, a feature being found on more cameras recently. This allows me to get slightly farther away from my subject and crop in, allowing for increased depth of field in a single frame:
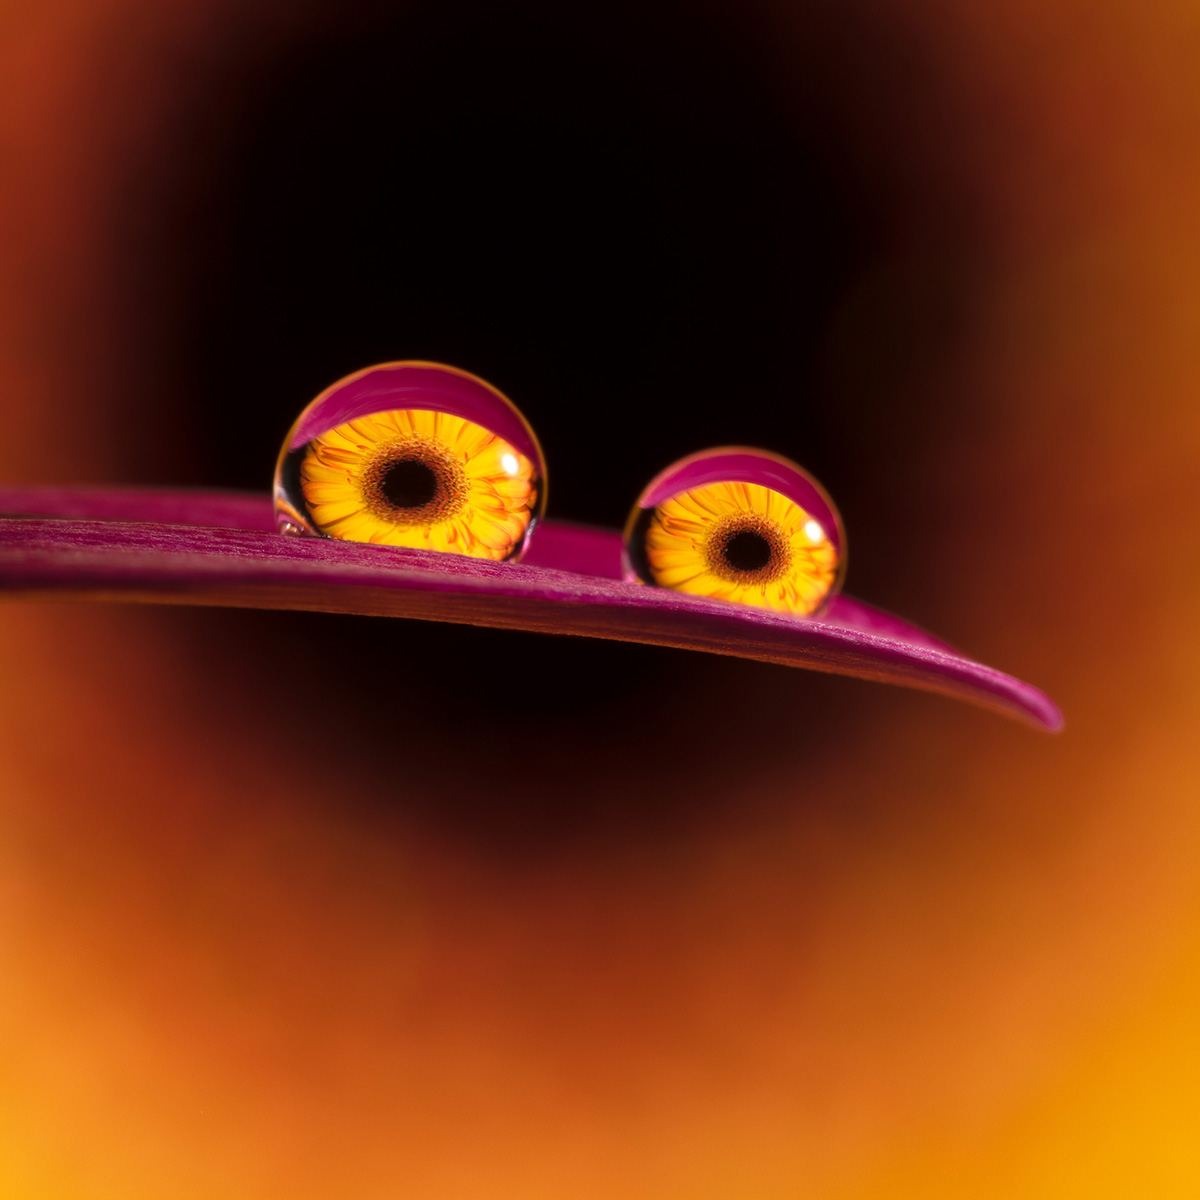
ISO 100, 1/25sec, F/8
If your camera doesn’t have such a feature, the lens can help. The image was created using the Laowa FFII 90mm F/2.8 CA-Dreamer lens, which is capable of achieving 2X (2:1) magnification. Since water droplets are small, you’ll want a lens that can natively push beyond the standard 1:1 magnification of most macro lenses.
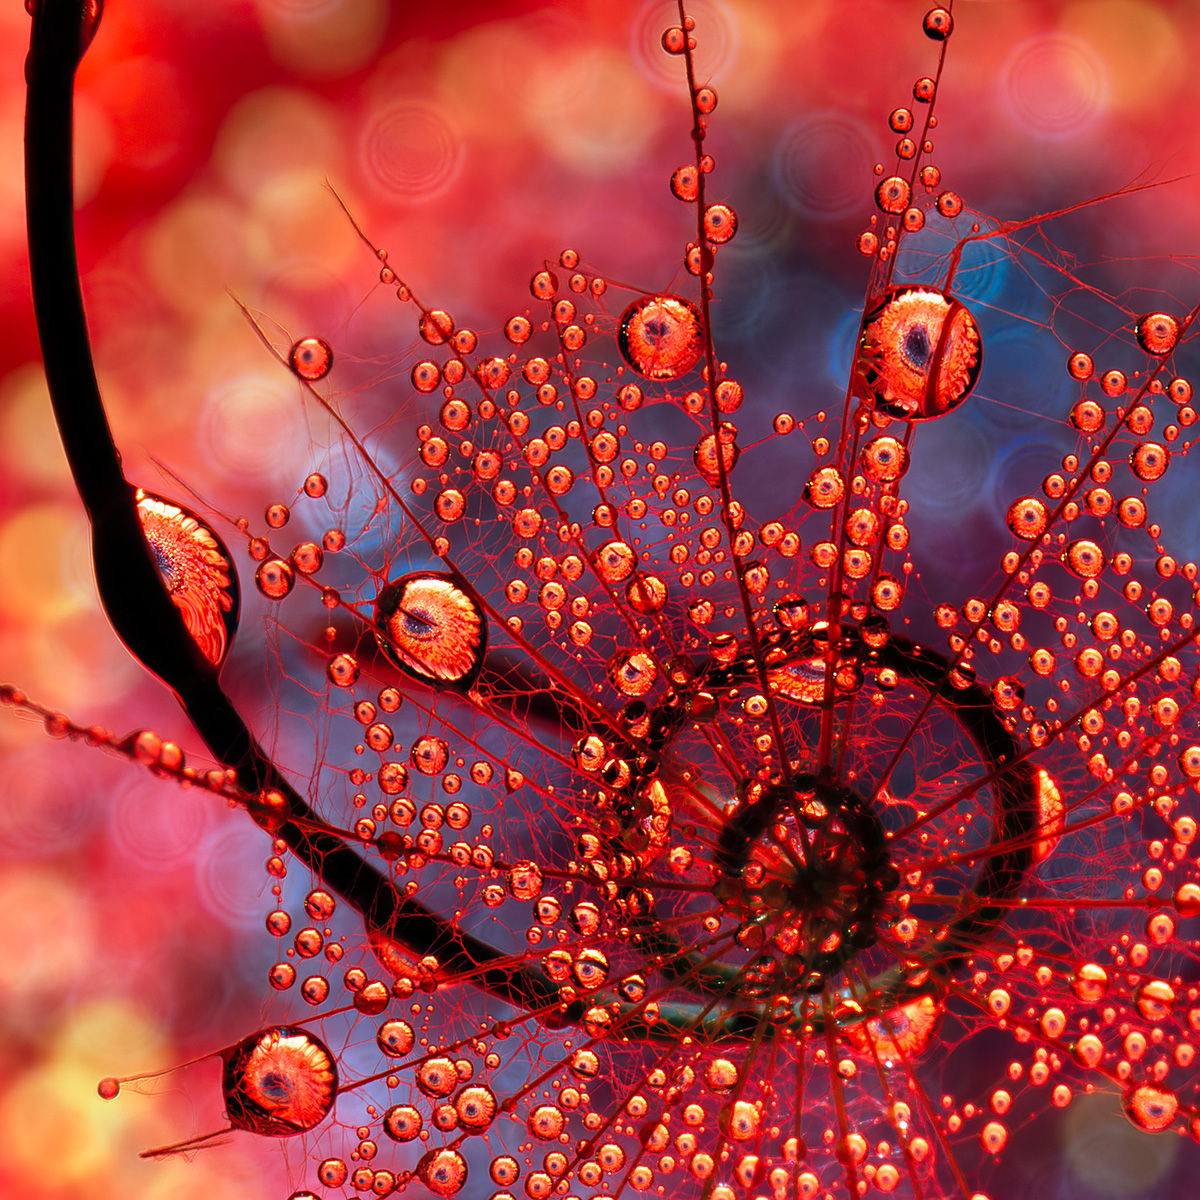
I get it: the above image looks like some googly-eyed flower bird. The “eyelid” effect comes from the droplets refracting the surface of the petal onto the top of the droplet (refractions are flipped. Interestingly, our eyes are all seeing the world upside down and our brains flip it back for us). Changing the angle can remove this to some degree, but you’ll want to have as much of as perfect “line of sight” to the background as possible. Anything that gets in the way will be a visible obstruction.
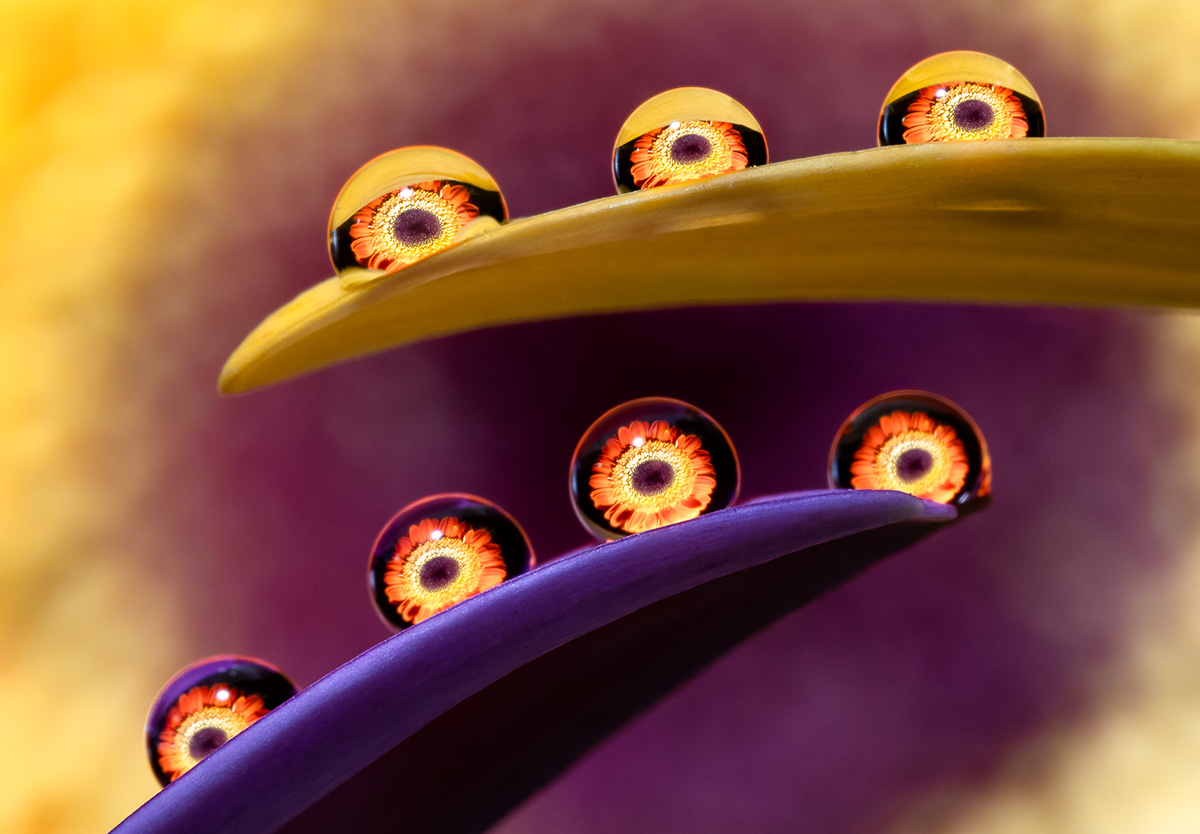
ISO 320, 1/24 sec, F/8
The above image was also created with the Laowa FFII 90mm F/2.8 CA-Dreamer lens, which is my current “workhorse” macro lens. For passion projects and professional work, this is the lens I trust more than any other lens in my studio.
We can see that the bottom droplets don’t have the eyelid effect whereas the top droplets do. Some petals have ridges that allow for the droplets to stand a little higher. And with more than two droplets, we lose the googly-eyed visual.
These droplets are created with simple tap water and no additives. Some people like to add glycerine to help the droplets stick a bit better to certain surfaces, but none of my images use this technique; water with glycerine tends to dry with a snail-slime look, which is not ideal if you’re using a spray bottle to create your droplets:
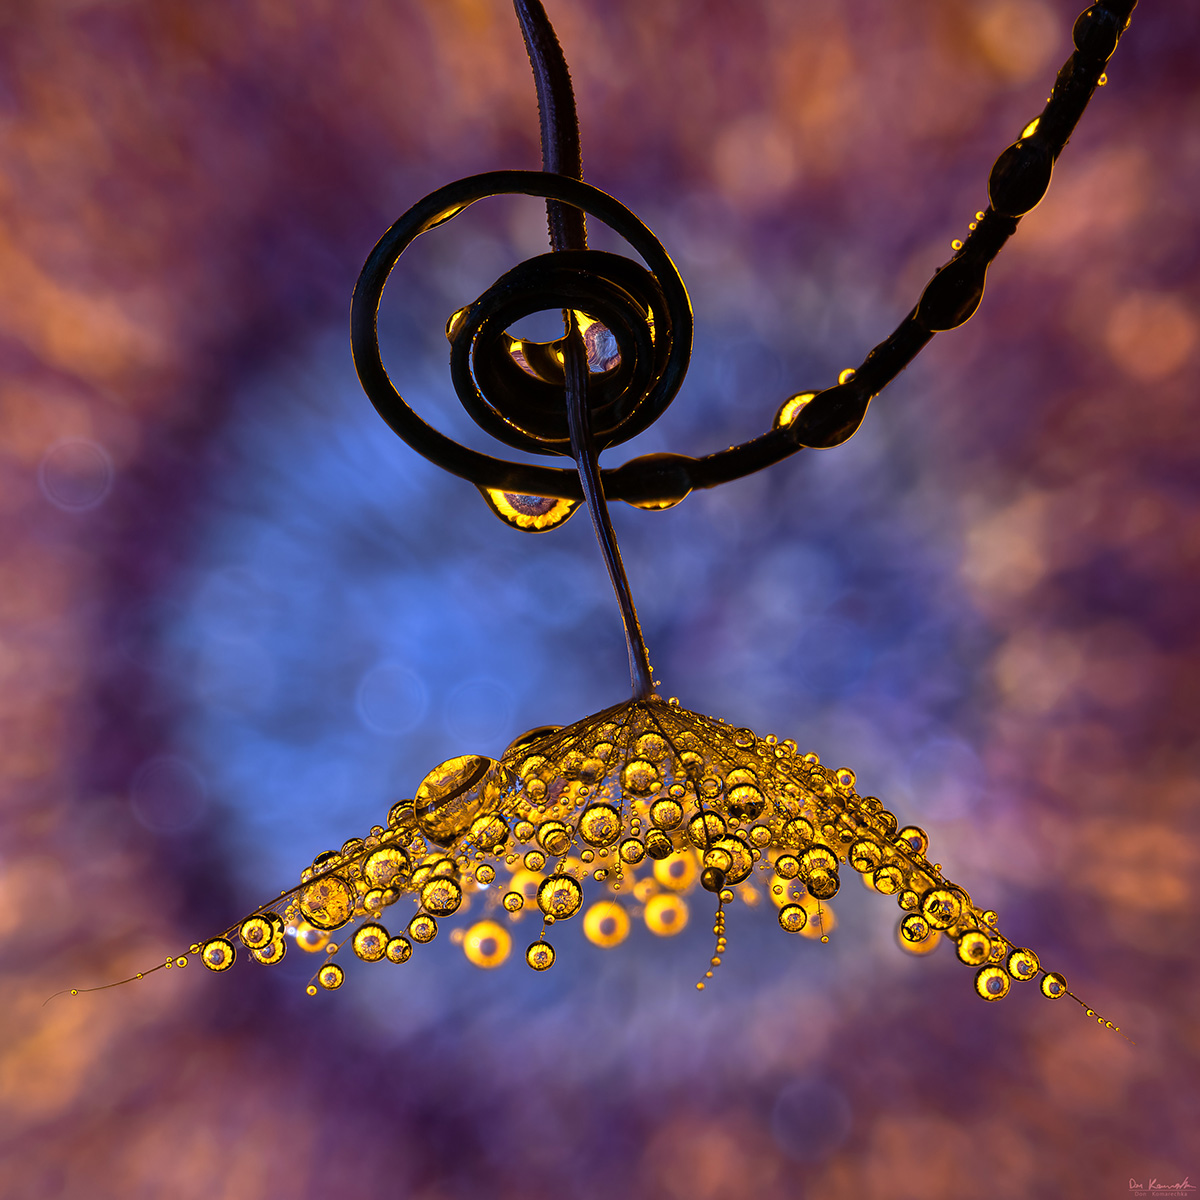
ISO 100, 1/13sec, F/11
Radiating lines and spirals, great for macro work! The seed head of a salsify flower (commonly called “Yellow Goat’s beard”) acts like a perfect droplet holder. These droplets were placed with a fine mist sprayer, emulating the dew you would find outside after a cold summer night. The image is shot from directly above:
The equipment that I use to position the subjects is always changing. Mini clamps are helpful, flexible arms as well, and small continuous lights. The hardest part is finding a subject that water droplets would naturally be spherical on. Here is a short list to start you off on this adventure:
- Spider Webs
- Wildflower seeds
- Lupin flower leaves (on the plant, not the flower petals)
- Barberry leaves
- Fuzzy cacti
- Many varieties of bluegrass, including Blue Fescue
Effectively, you’re looking for anything that is naturally hydrophobic. Butterfly wings or certain bird feathers also work if you have some as specimens.
ISO 100, 1/15sec, F/11
Depth of field is a challenge, but diffraction can start to lower your image quality at high magnification. I recommend shooting between F/8 and F/11 for the majority of this work, with the camera on a tripod and a low ISO setting. This may result in a slower-than-ideal shutter speed, so put your camera on a 2-10 second timer and step back (or control the camera remotely).
This is another example image from the Laowa FFII 90mm F/2.8 CA-Dreamer lens. From the Laowa lenses in their current line-up that are best suited to this sort of photography, I can recommend most of them. The combination of being able to get very close, coupled with the superior optical designs and availability in virtually every lens mount, you’ll be able to use any of these very effectively:
- Laowa 100mm f/2.8 2:1 Ultra Macro APO
- Laowa 60mm f/2.8 2X Macro
- Laowa 65mm f/2.8 2x Ultra Macro APO
- Laowa 50mm f/2.8 2X Ultra Macro APO MFT
- Laowa 85mm f/5.6 2x Ultra Macro APO
- Laowa 90mm f/2.8 2x Ultra Macro APO
- Laowa 58mm f/2.8 2X Ultra-Macro APO
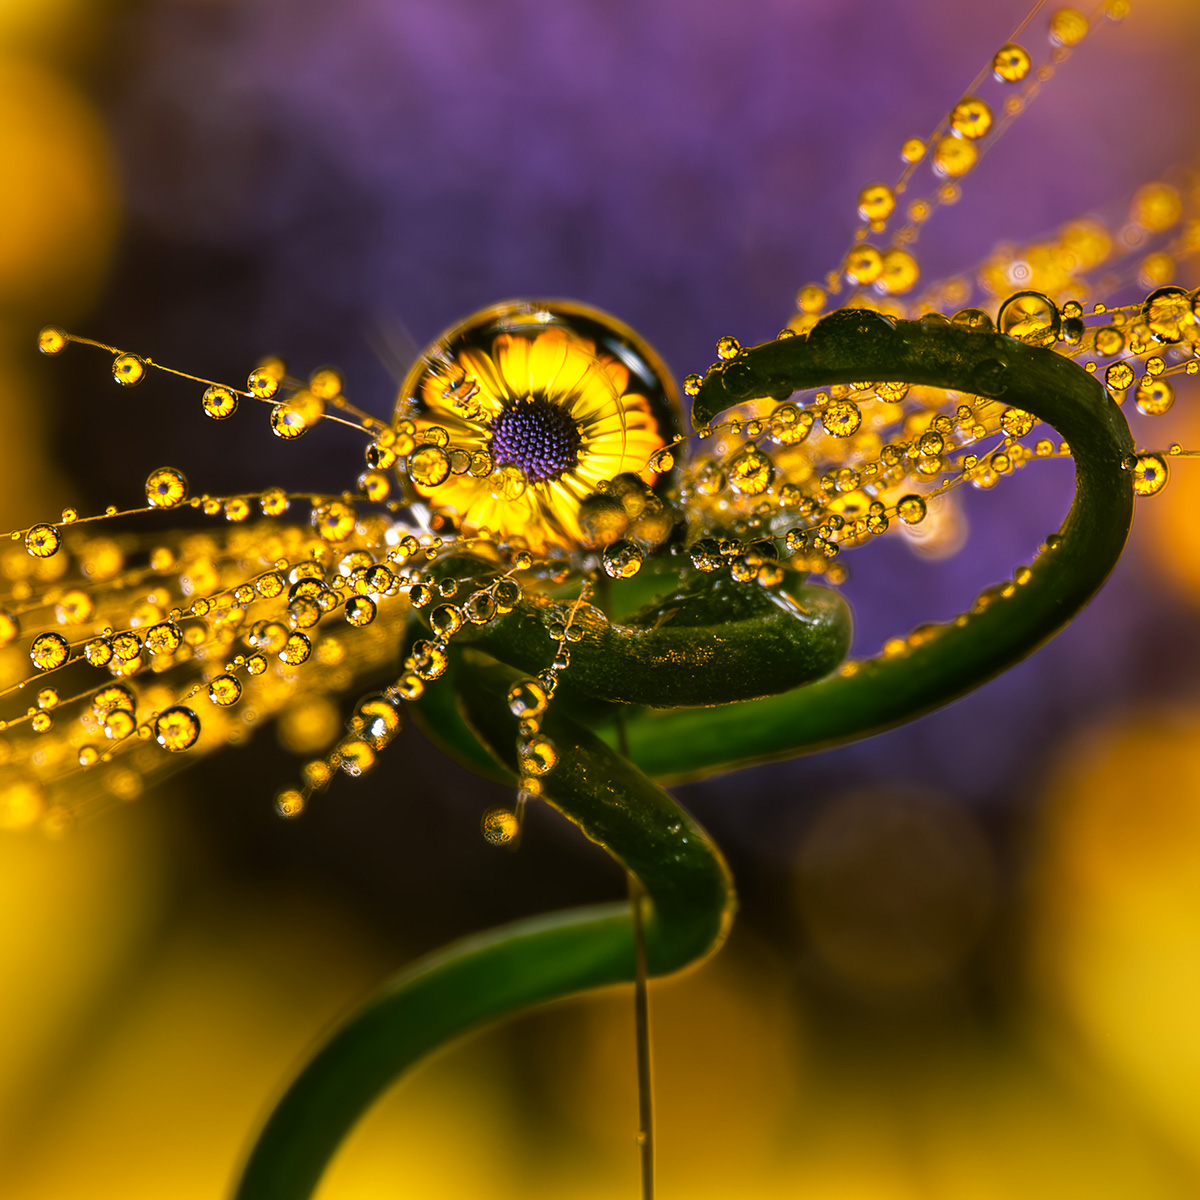
Notice the background in this image? It’s the out-of-focus center of the flower, a small sunflower placed roughly six inches behind the droplet “structure”. The distance you place the flower is variable: the smaller the flower, the closer it goes to the droplet. Gerbera daisies are typically a few inches away. If the flower appears too small in the droplet, move the flower closer. If you can see beyond the edges of the flower in the droplet, also note that whatever is in the room behind the flower might be visible at the edges of the droplet. Use a backdrop of a bedsheet or get creative with colours. If your light source is bright enough, it’ll all just fade to black anyhow.
Most of this article was focused on flowers, but you can get creative with other concepts as well. How about the Earth in a water droplet?
ISO 100, 1/2sec, F/7.1
You can put a photo in behind a droplet as well, just like this one from NASA’s archives. What creative opportunities can you find?
One caveat: I often spend more time tinkering with droplet setups than actually taking photographs. Sometimes hours will pass by as I experiment and try different ever-evolving concepts. Part of the journey here is to spend quality time creating a piece of natural artwork which is worthy of your photographic efforts. The images don’t just “happen”. Expect to fail; expect frustration. It’s all part of the process. My best days in the studio have been spent mired in compositional quandaries. Revel in this creative process.
Laowa Macro Month Sale – Save up to 17% OFF!
Sale valid until May 31, 2024









Love the artistry in the macro images created from your technique! Amazing images!